 DiDiPick
DiDiPick user guide
From signing up and installing the app, through connecting Chrome, your Facebook Page and your phone, to making clips from Shopee Affiliate products and posting them automatically. Go through the sections in order once; after that you only need section 9 onward. Screenshots are from Windows — the app looks the same on a Mac. The app is in Thai, so button names are quoted in Thai with a translation.
1. What you need
- A Windows 10/11 PC or a Mac
- Google Chrome
- A Google account that can use Google Flow — one Chrome per Flow account
- A Shopee Affiliate account
- A Facebook Page you admin
- An Android phone signed in to the Shopee app, with a USB cable that carries data (charge-only cables will not work) — used to post to Shopee Video
- A Gemini API key (optional) — needed only if you want AI to write the script and direct the scenes (Director mode). See section 10
2. Sign up and download
Go to didipicks.com and press Sign in. Sign in with your Google account.
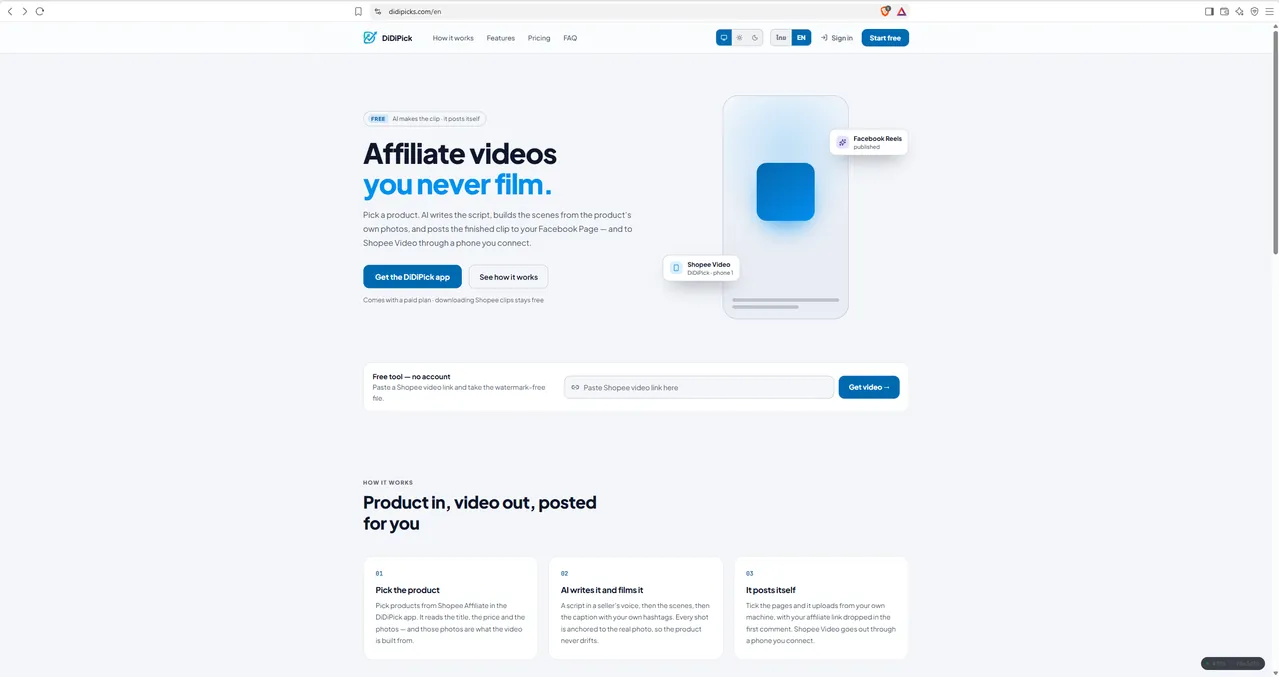
didipicks.com home page 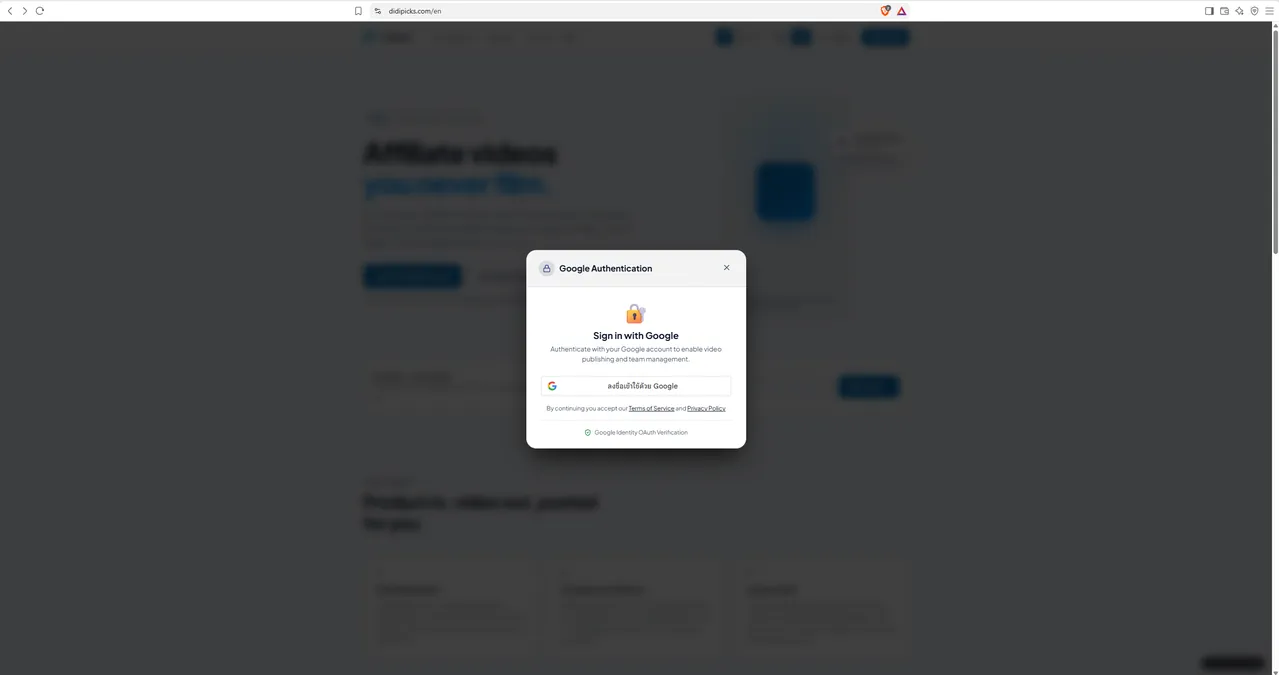
Sign in with Google Press “Get the DiDiPick app” to open the download page. Download two files: the DiDiPick app (Windows or macOS) and DiDiPick Connector (a zip for Chrome).
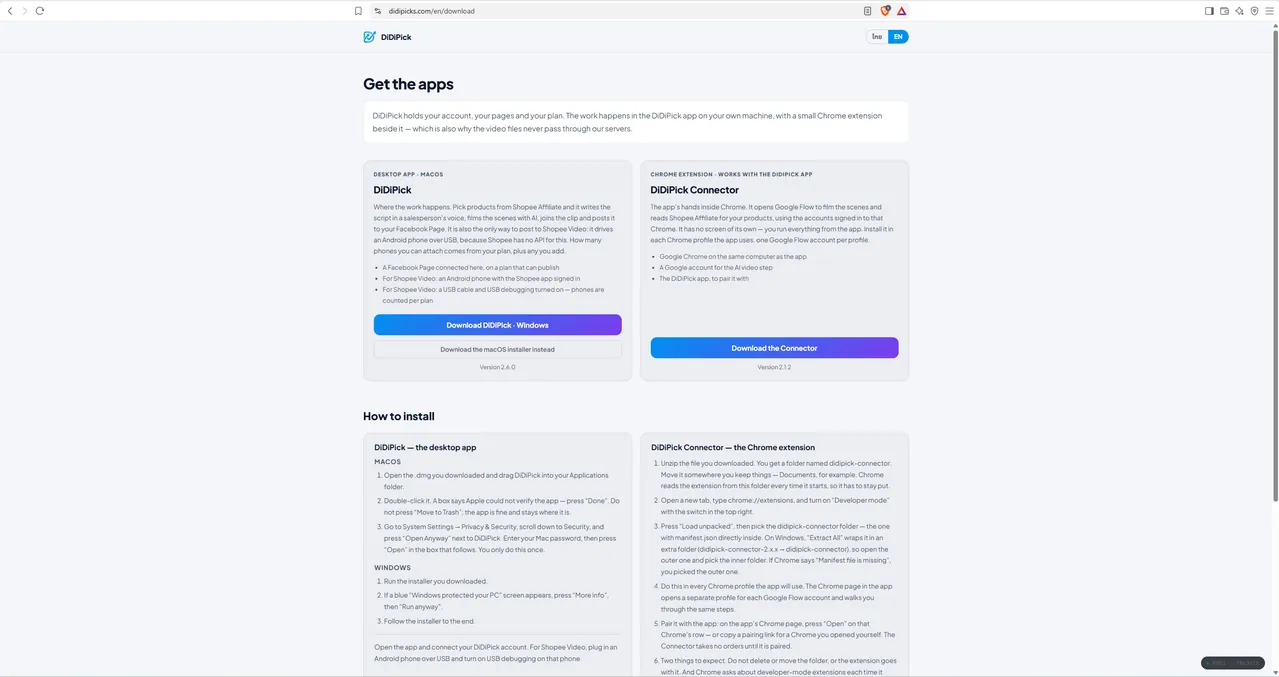
Download page for the app and the Connector
3. Install the app
Windows: open Downloads and double-click DiDiPick_x.x.x_x64-setup.
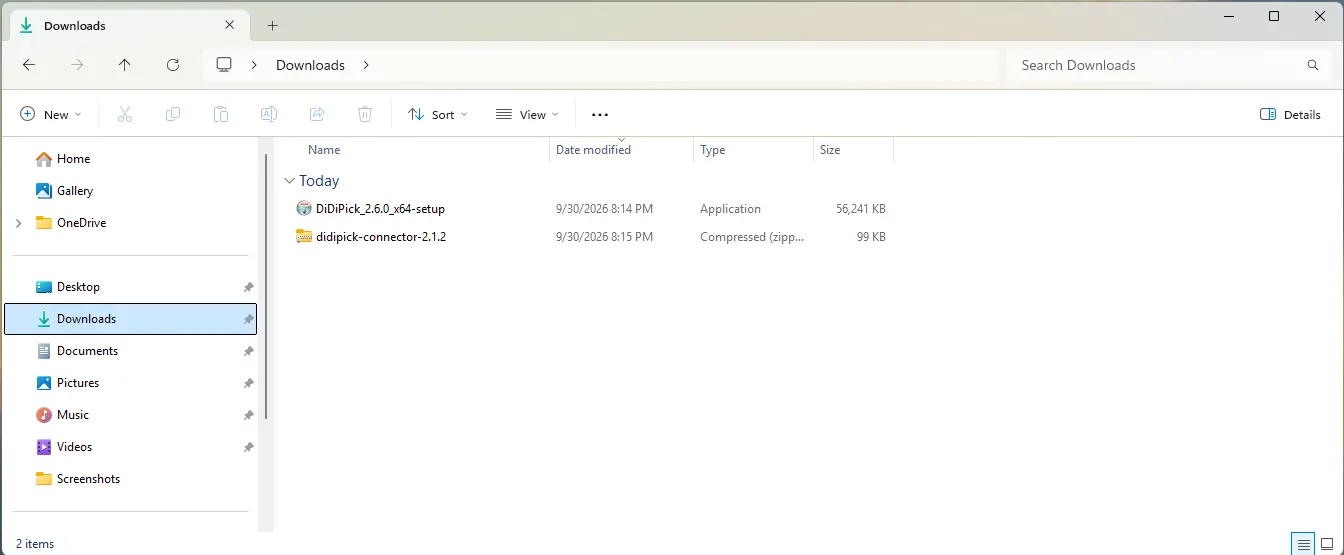
The downloaded files in Downloads If a blue “Windows protected your PC” screen appears, press More info, then Run anyway. It appears because the app is not signed with a paid Microsoft certificate — not because of a virus.

Press More info 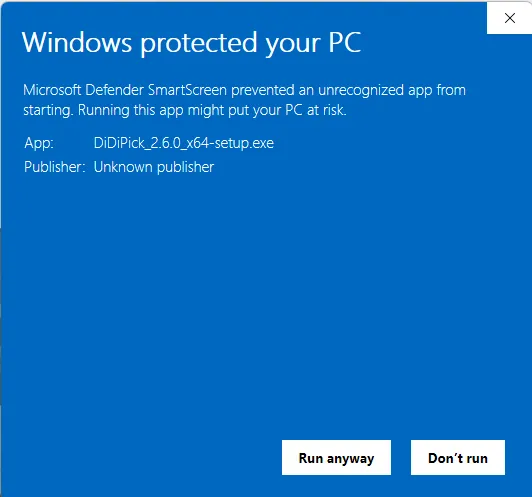
Press Run anyway Press Next through the installer — the suggested folder is fine. On the last page leave Run DiDiPick ticked and press Finish.
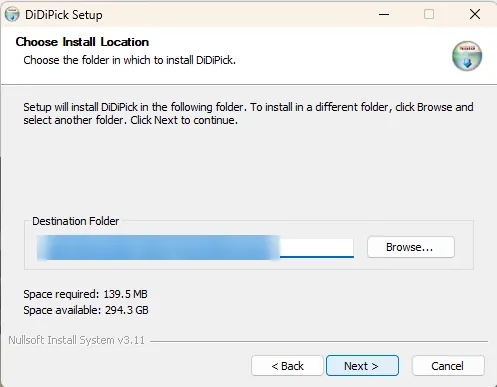
Install location 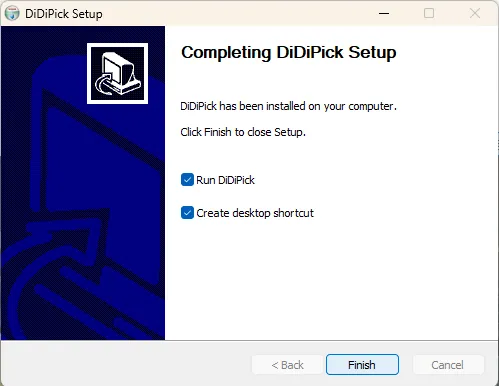
Setup complete Mac: open the .dmg and drag DiDiPick into Applications. Double-click it; if a box says Apple could not verify it, press Done (not Move to Trash). Go to System Settings → Privacy & Security, scroll to Security, press Open Anyway next to DiDiPick, enter your Mac password, then press Open. You only do this once.
4. Connect your DiDiPick account
The first time the app opens it shows “เชื่อมต่อบัญชี DiDiPick” (connect your account). Press Connect DiDiPick and the app opens the website.
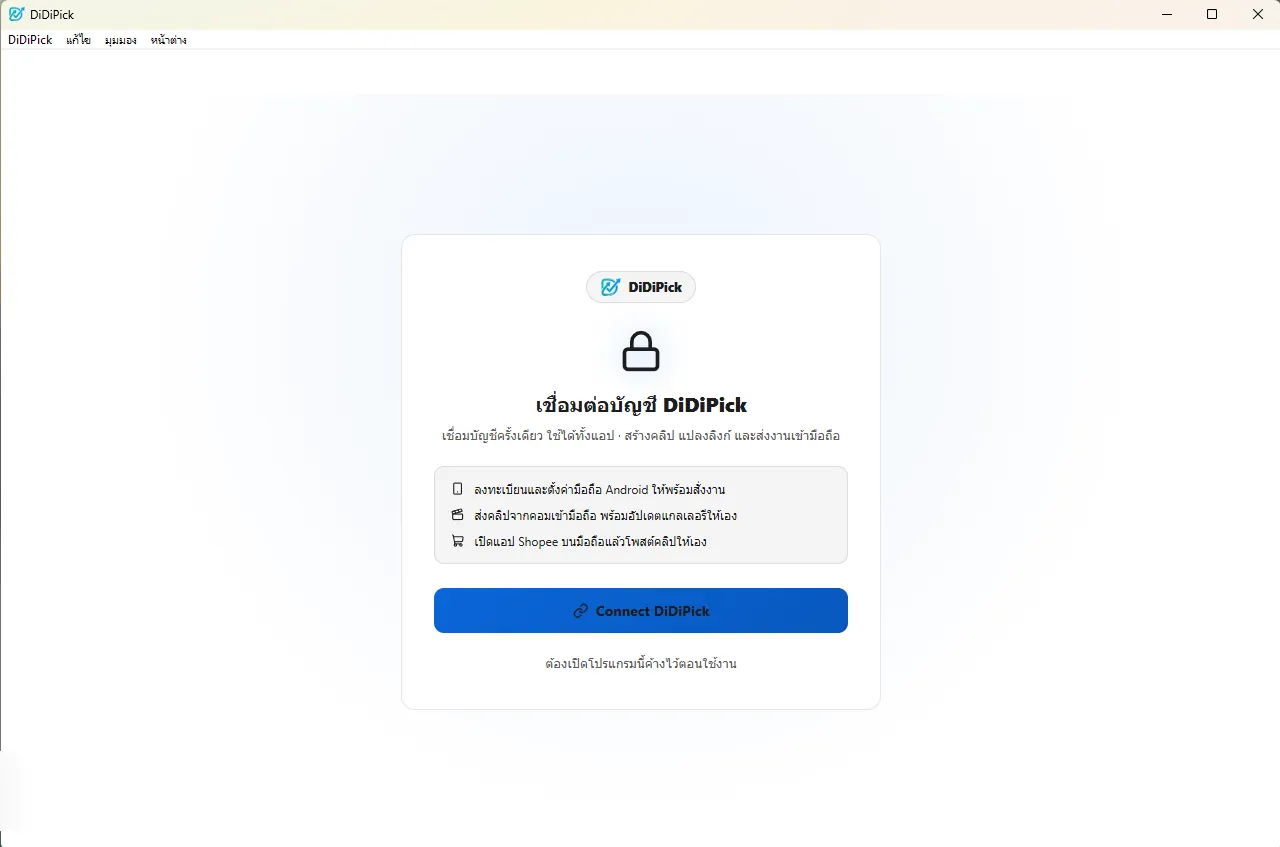
Connect screen in the app On the website press Allow. When it says the app is connected, close that tab and go back to the app.

Allow the app to use your account 
Connected
The strip at the bottom of the app shows Chrome, the Flow tab, the phone and Gemini. Green means ready; orange or grey means not yet.
5. Connect Chrome and Google Flow
The app drives Google Flow inside Chrome to make images and videos, through the DiDiPick Connector extension. One Chrome = one Flow account.
Right-click didipick-connector-x.x.x.zip → Extract All → Extract. You get two nested folders (didipick-connector-x.x.x → didipick-connector). Move them somewhere permanent such as Documents — Chrome reads the extension from there every time.
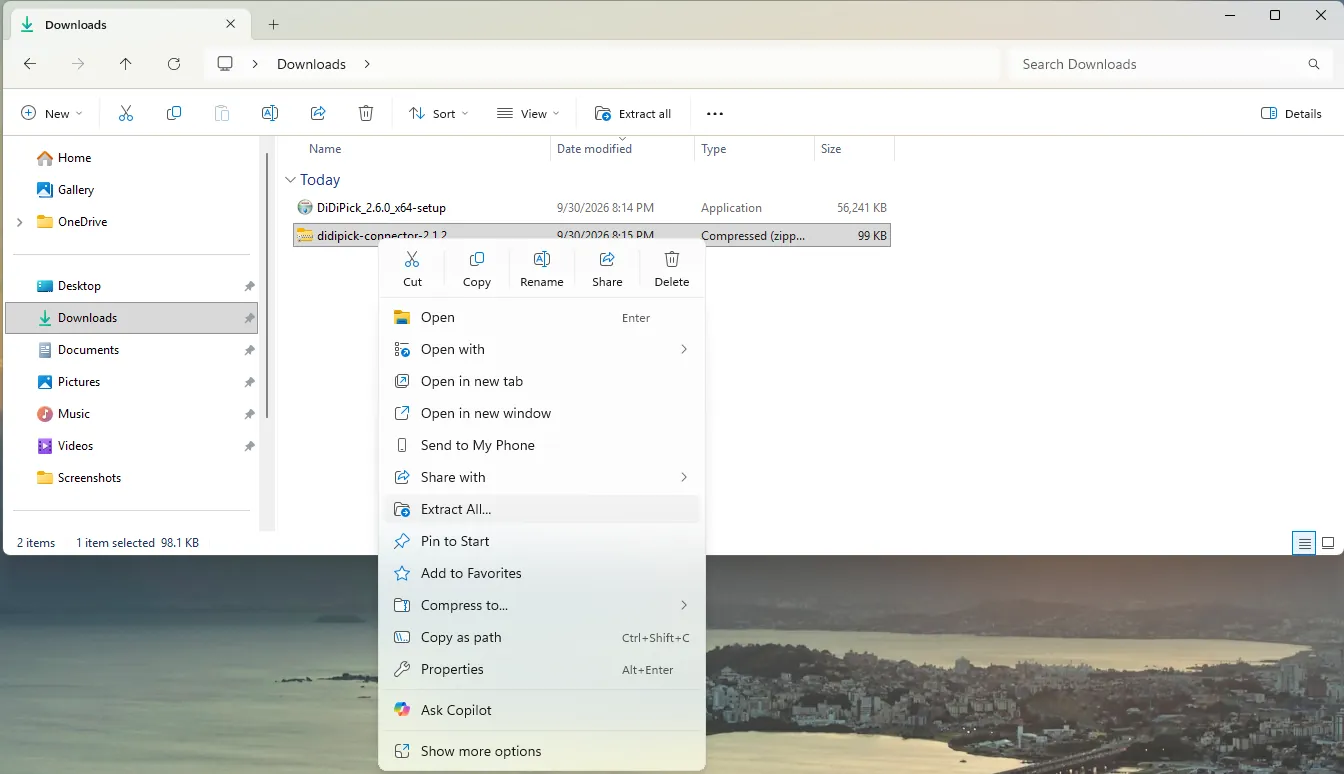
Extract All 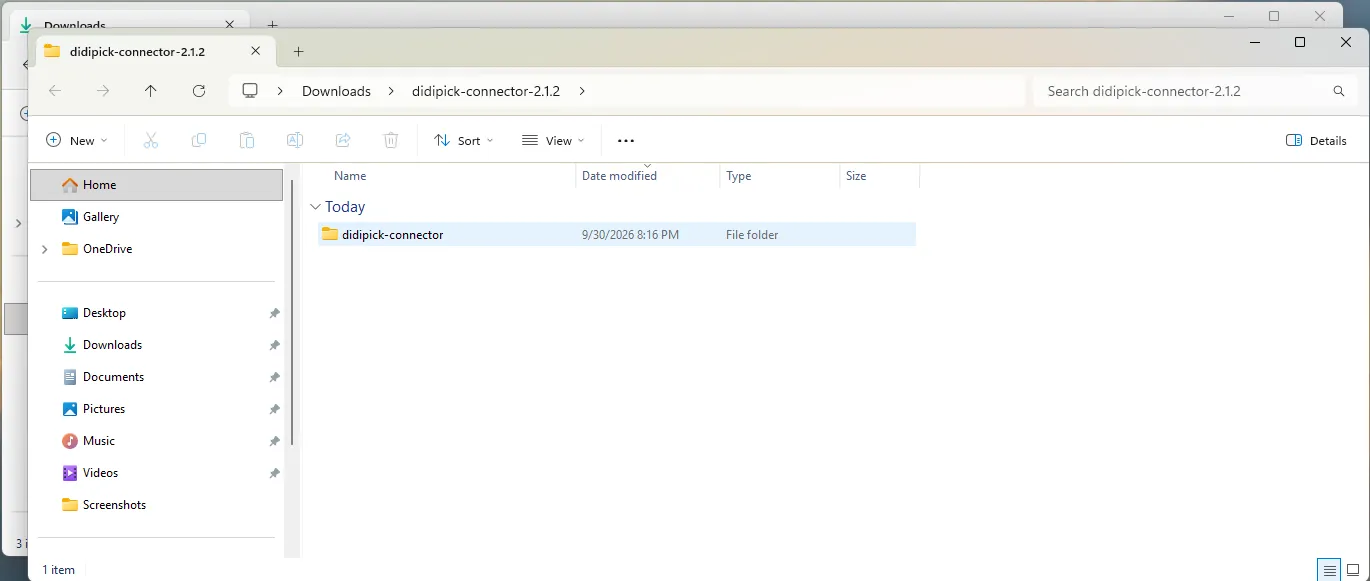
The inner folder is didipick-connector In the app open the Chrome menu, press “+ เพิ่ม Chrome” (add Chrome) and give it a name. The app opens a new Chrome with its own profile and a “set up this Chrome” page.

The Chrome page in the app 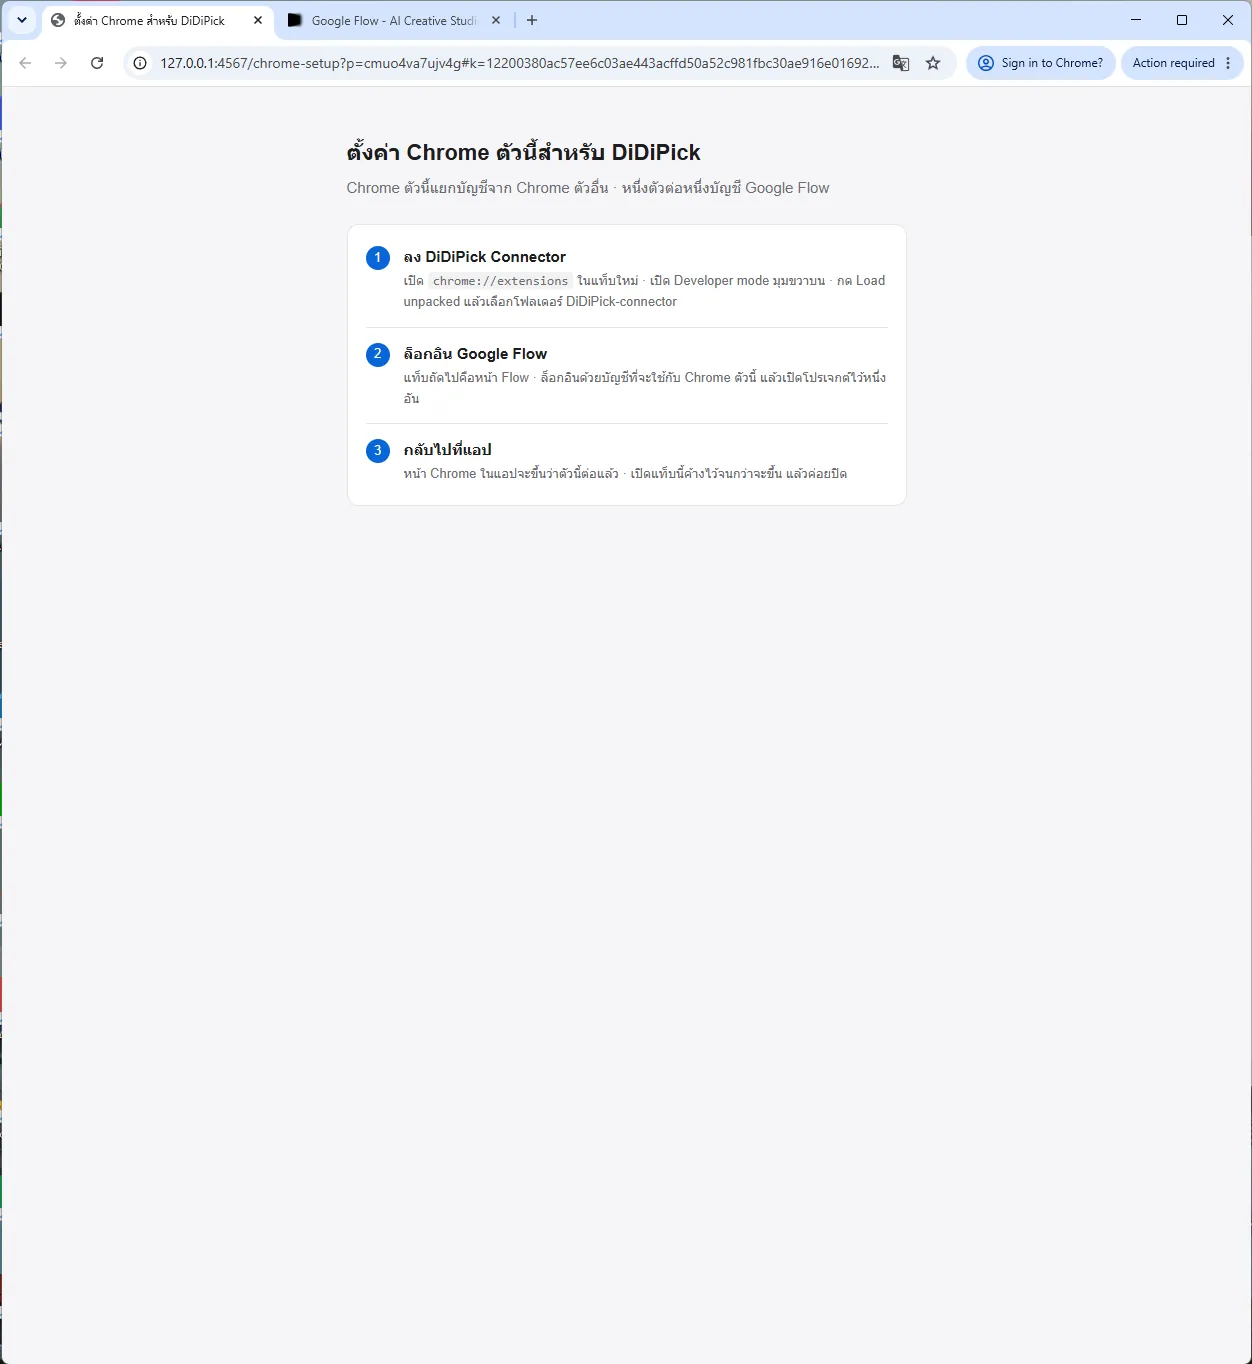
The set-up page in the new Chrome In that Chrome open a new tab and go to chrome://extensions. Turn on Developer mode in the top right.
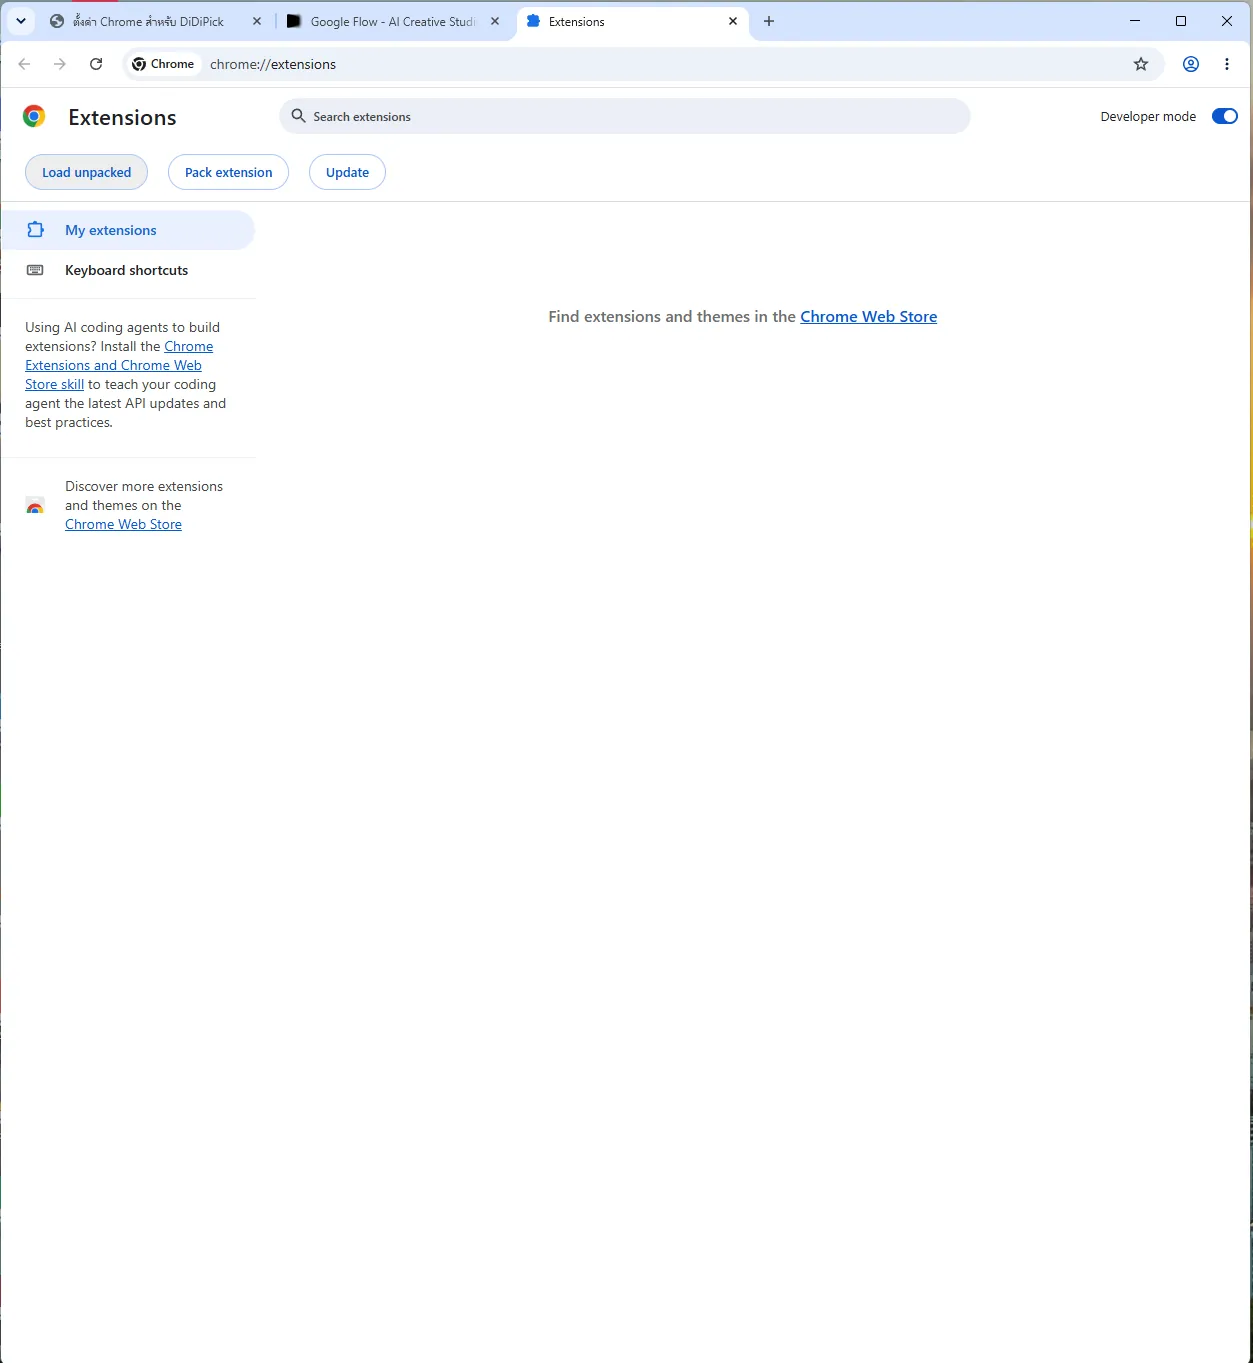
Developer mode on Press Load unpacked and pick the inner didipick-connector folder (the one with manifest.json inside). If Chrome says the manifest is missing, you picked the outer folder.

Pick the inner folder 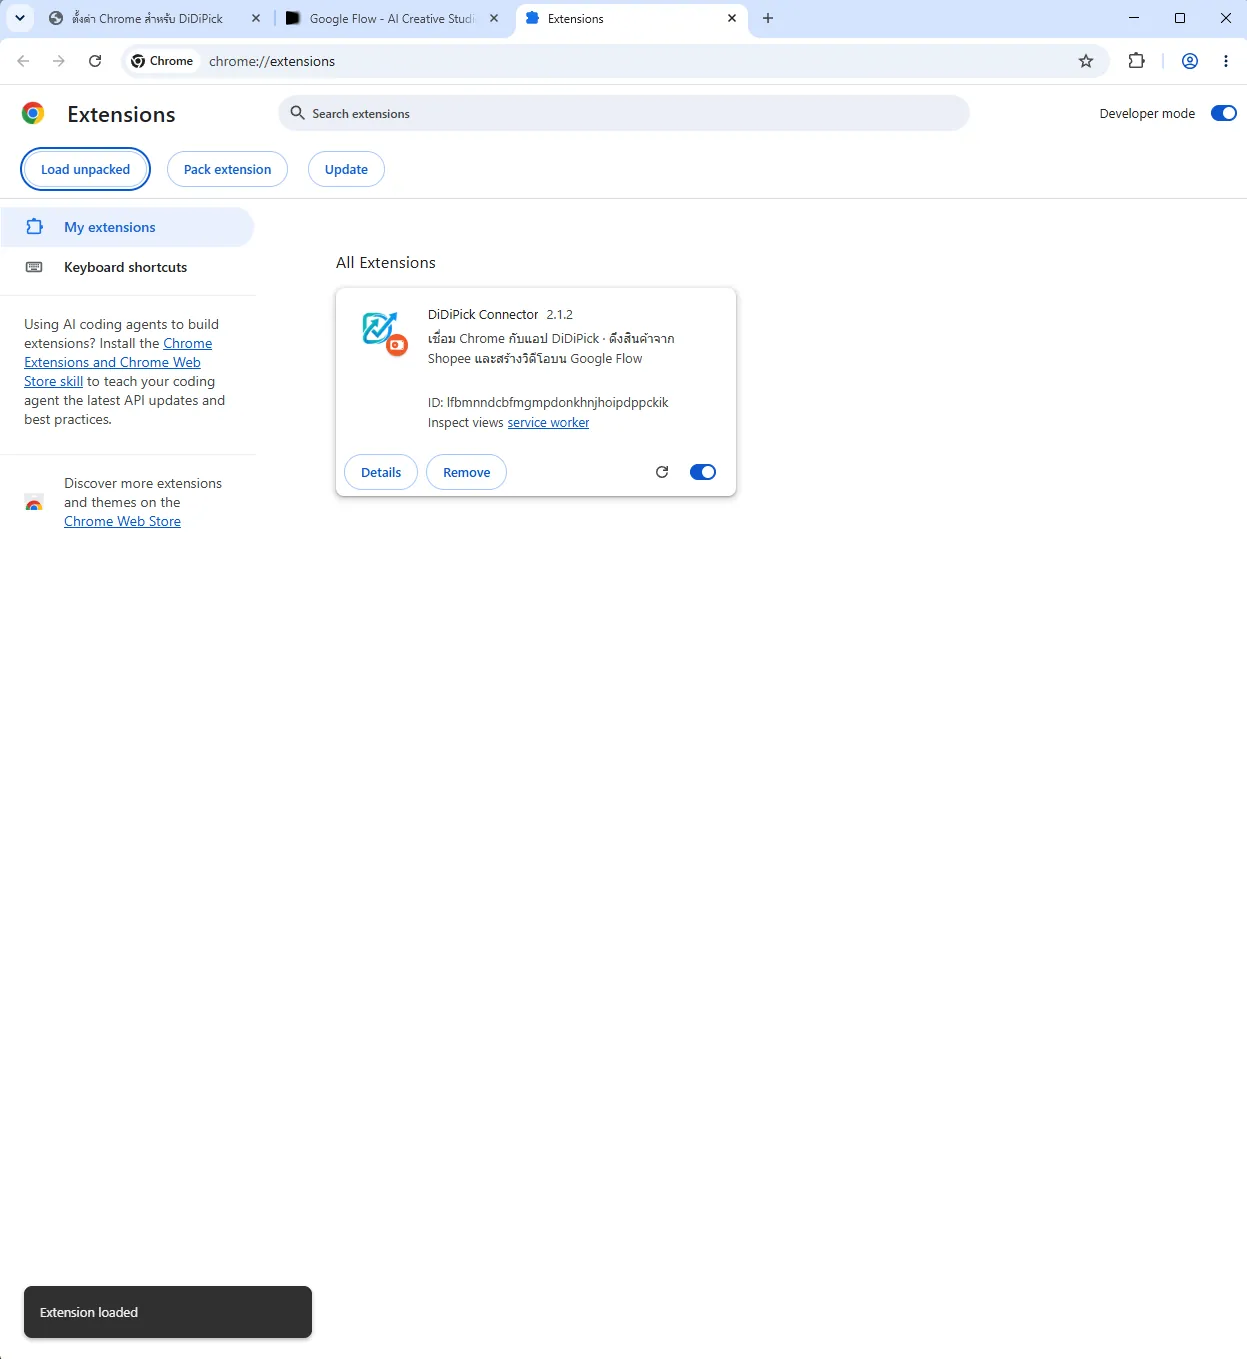
The DiDiPick Connector card appears Sign in to Chrome and to Google Flow (labs.google/flow) with the Google account for this Chrome. Open one project in Flow.
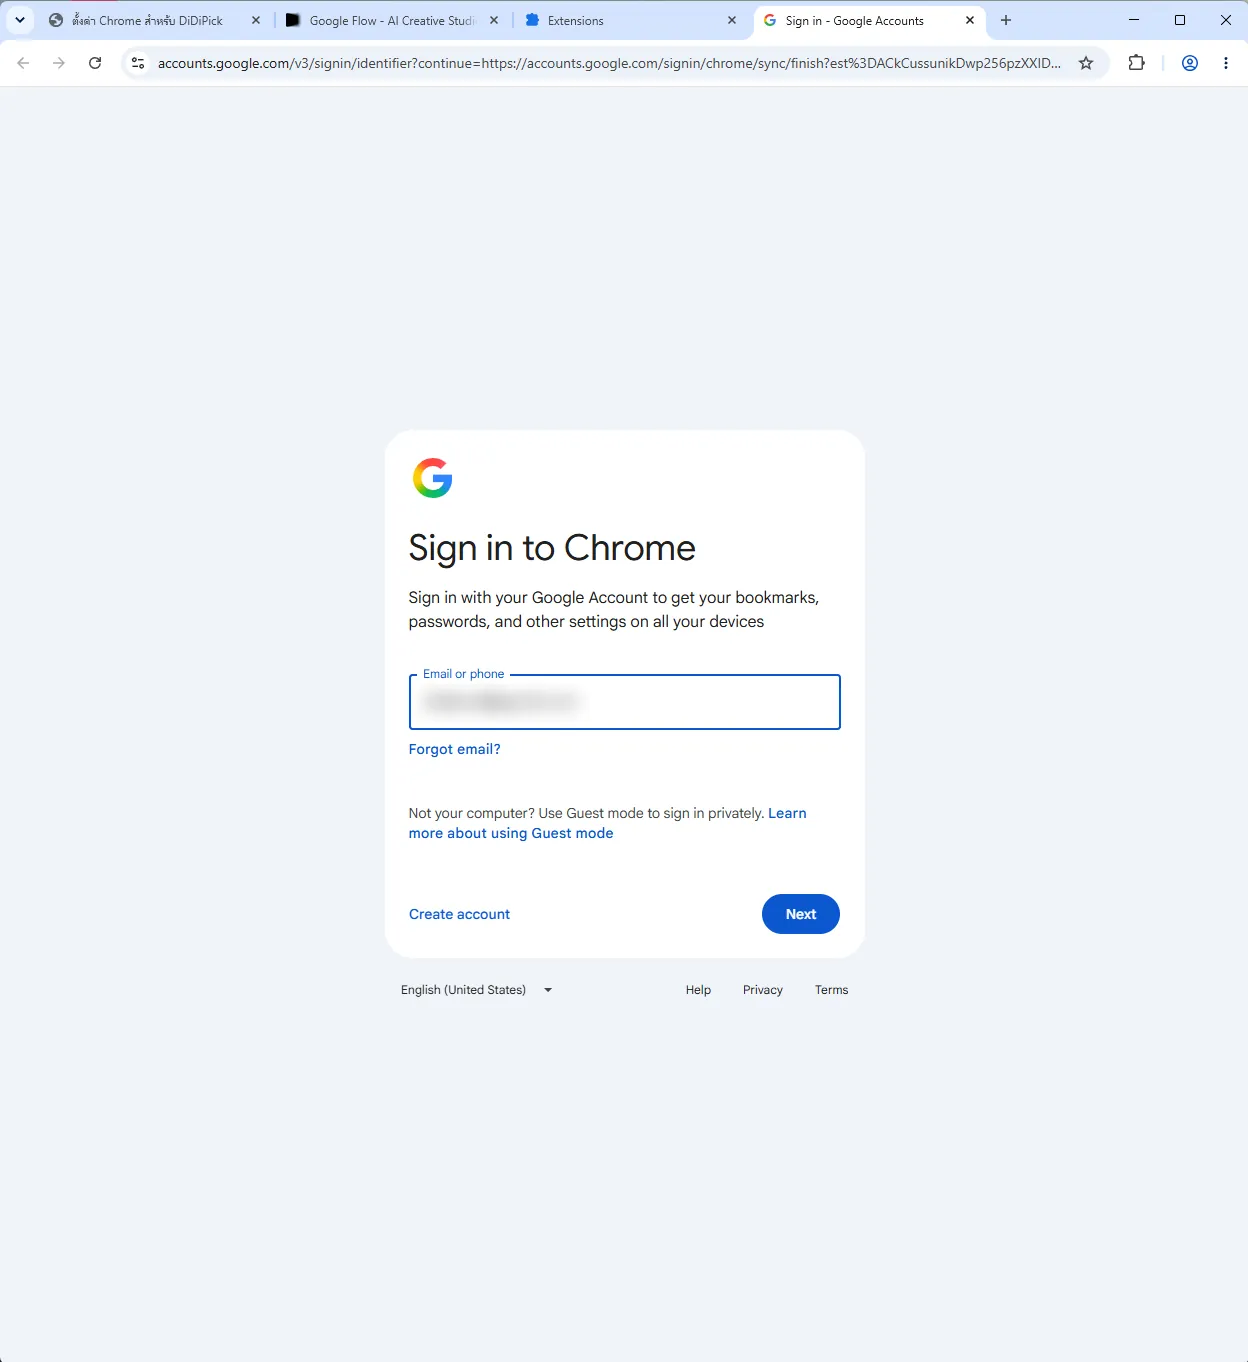
Sign in to Chrome 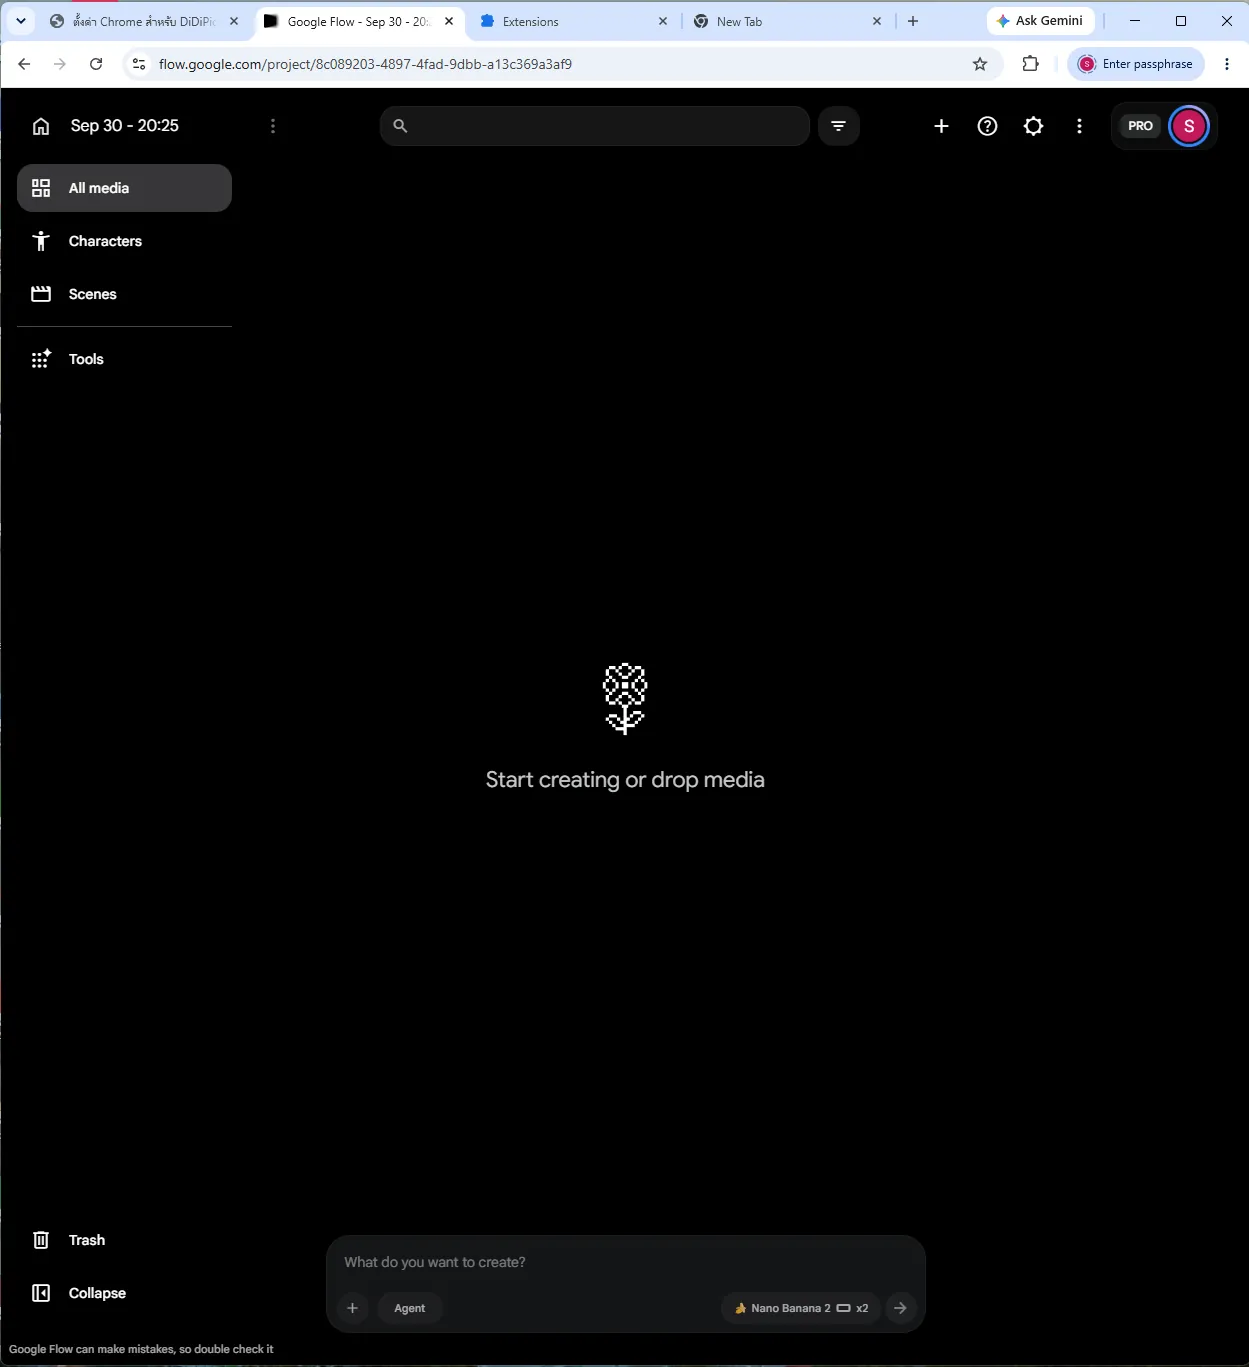
A project open in Google Flow Back in the app, the Chrome 1 row shows green “ต่ออยู่” (connected) and “Flow พร้อม” (Flow ready). The “สร้างวิดีโอ” switch lets this Chrome take clip jobs; the “ดึงสินค้า” radio marks the one Chrome that opens Shopee Affiliate.

Chrome ready In the Chrome marked “ดึงสินค้า”, sign in to Shopee with your Affiliate account. Shopee may ask you to verify by SMS.
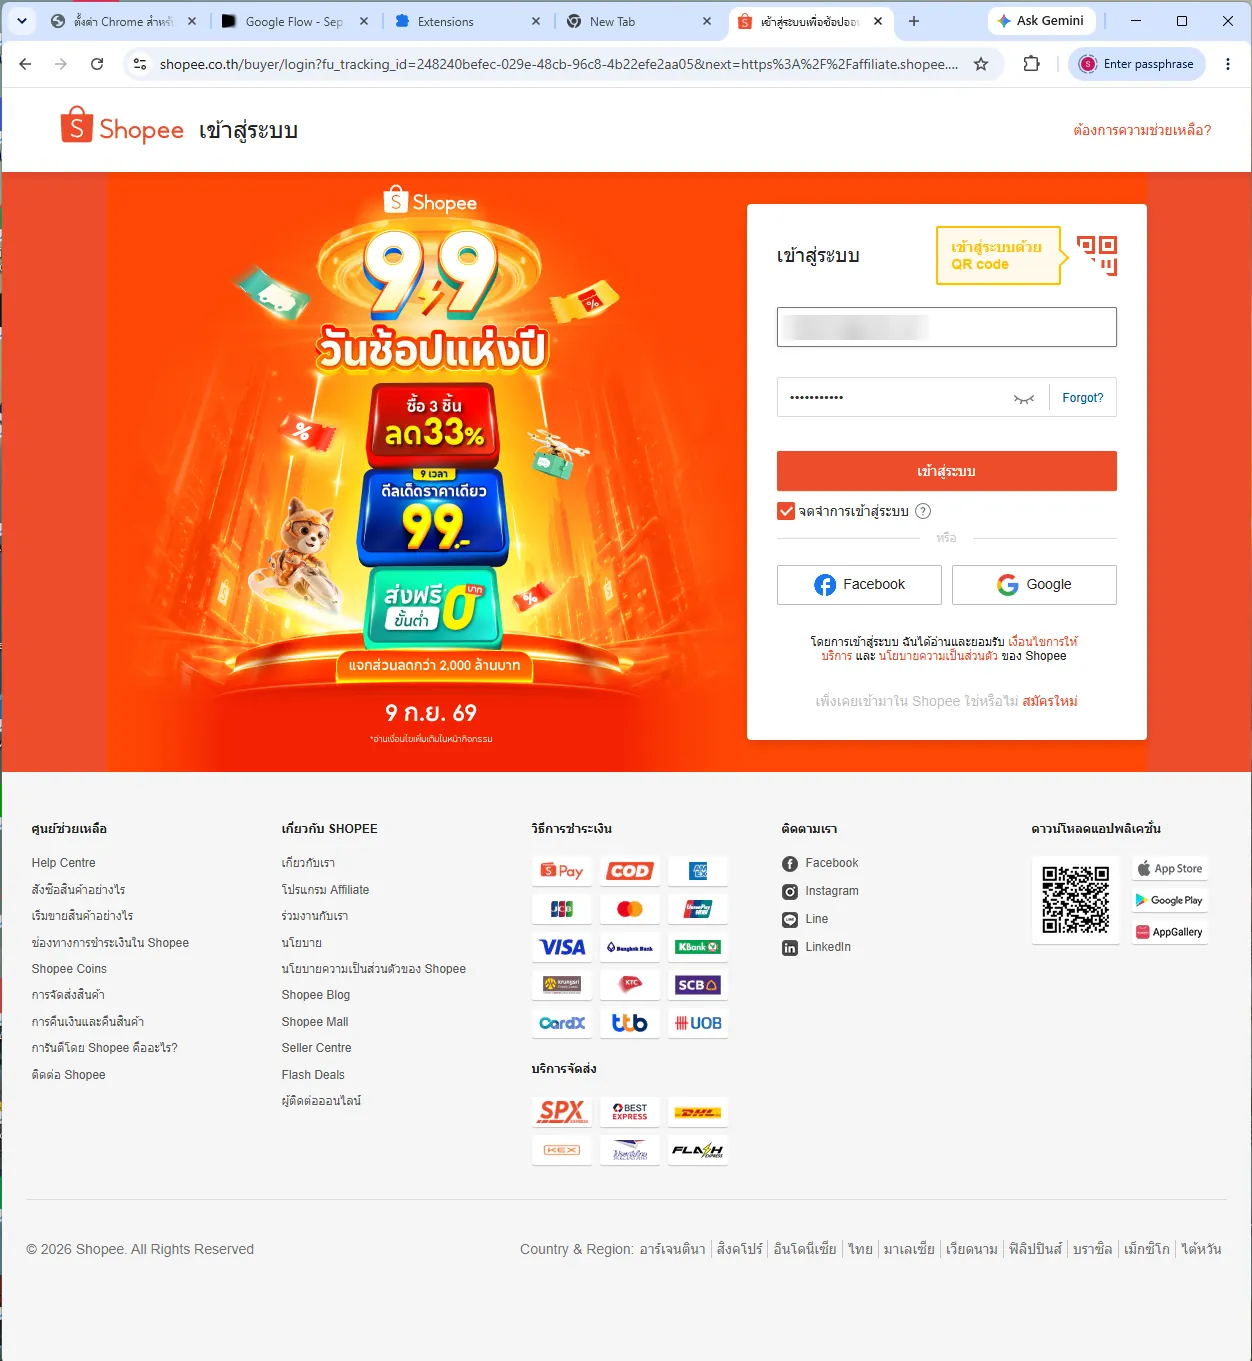
Sign in to Shopee
For more Flow accounts press “+ เพิ่ม Chrome” again and load the Connector in each new Chrome. How many you can use depends on your plan.
6. Connect your Facebook Page
Open the Facebook menu and press “+ เพิ่มเพจ” (add Page). The app opens Facebook so you can sign in and choose Pages.
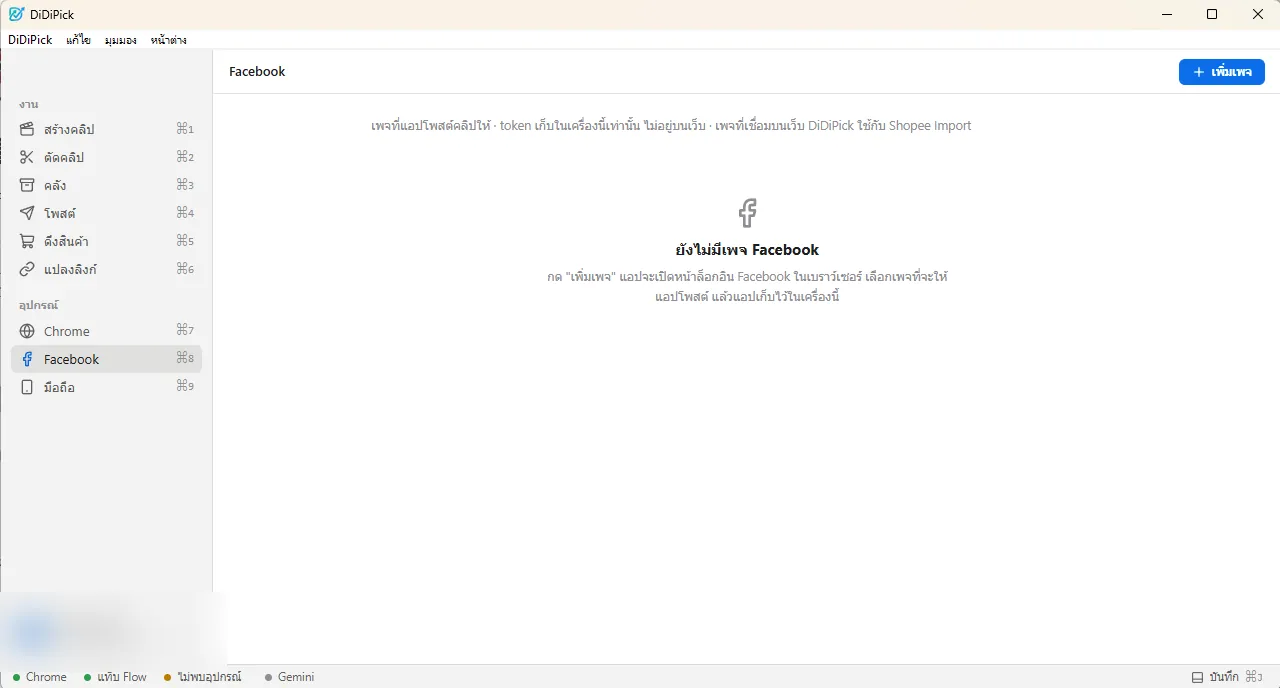
The Facebook page in the app Tick the Pages DiDiPick should post to and press Connect selected.
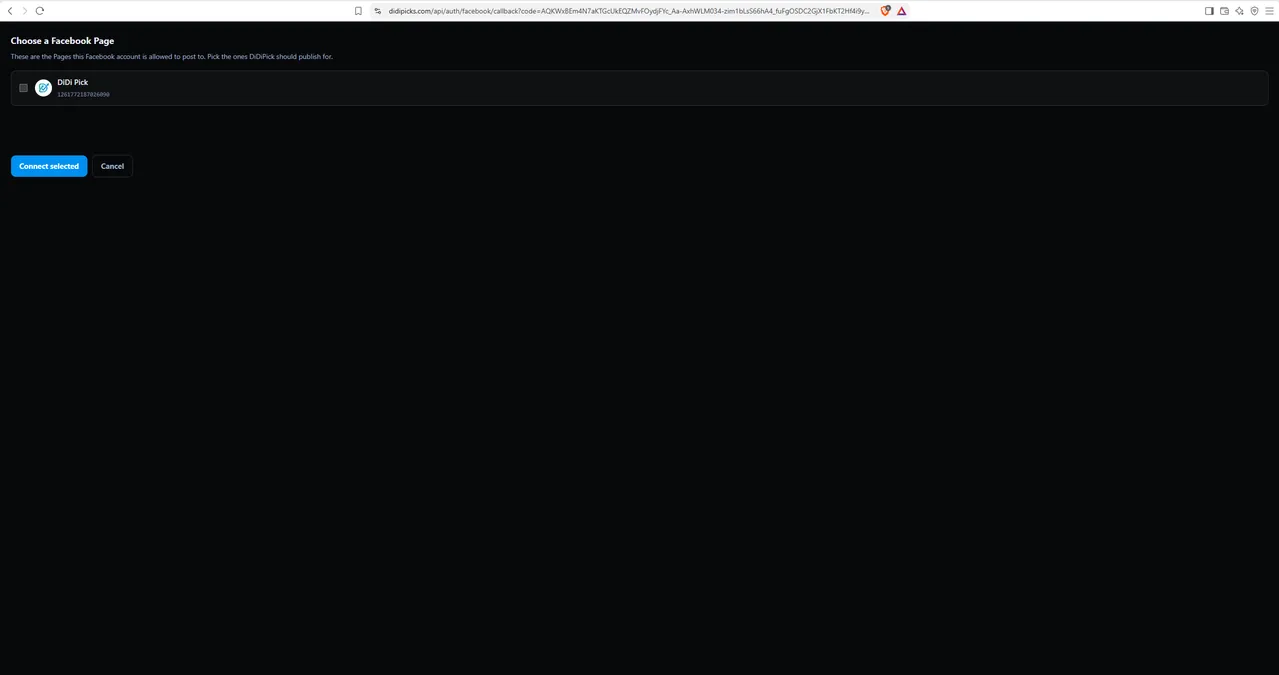
Choose Pages The Page shows up with a “โพสต์อยู่” (posting) switch. Choose where the product link goes: first comment, in the caption, or both.
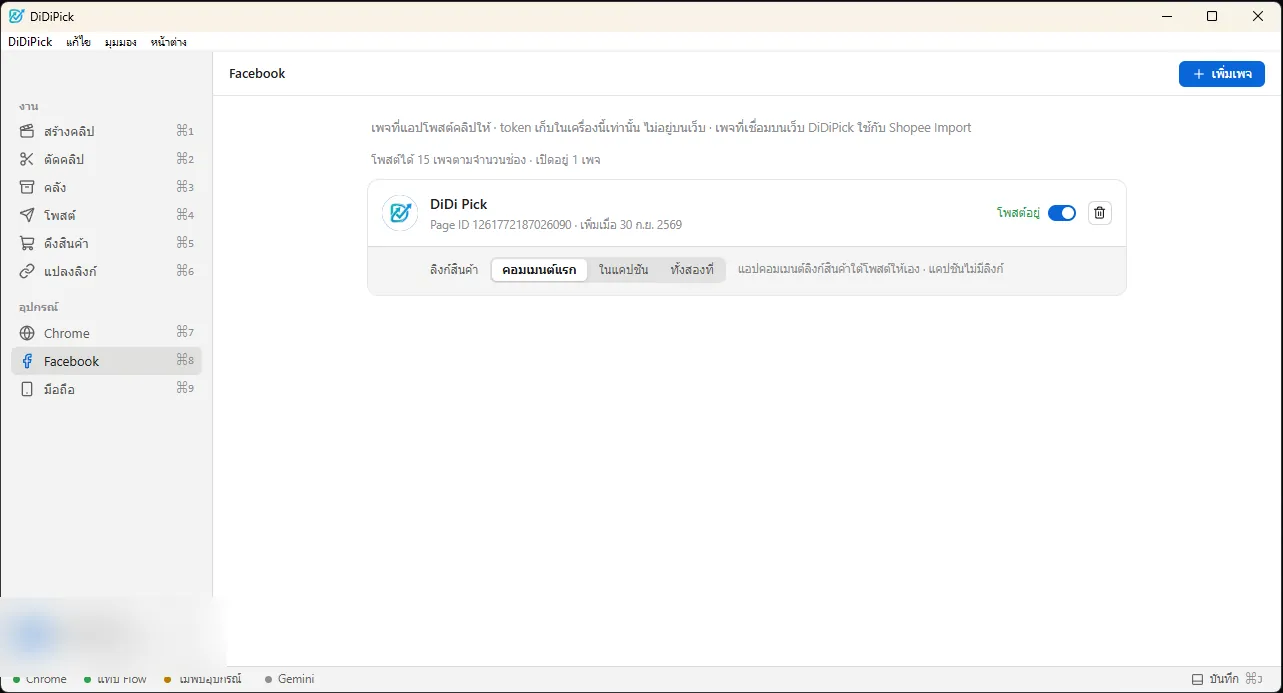
Page ready to post
7. Before the phone set-up: copy an affiliate link on the phone
At point 12 you paste a product link into the Shopee app on the phone yourself, so the next screens appear (points 13–15). If nothing is copied on the phone, no product appears and you cannot go on.
On the phone open the Shopee app, open any product, press Share (share for commission), then “คัดลอกลิงก์” (copy link). When it says the link is copied you are done — no need to paste it anywhere.

Share for commission → copy link 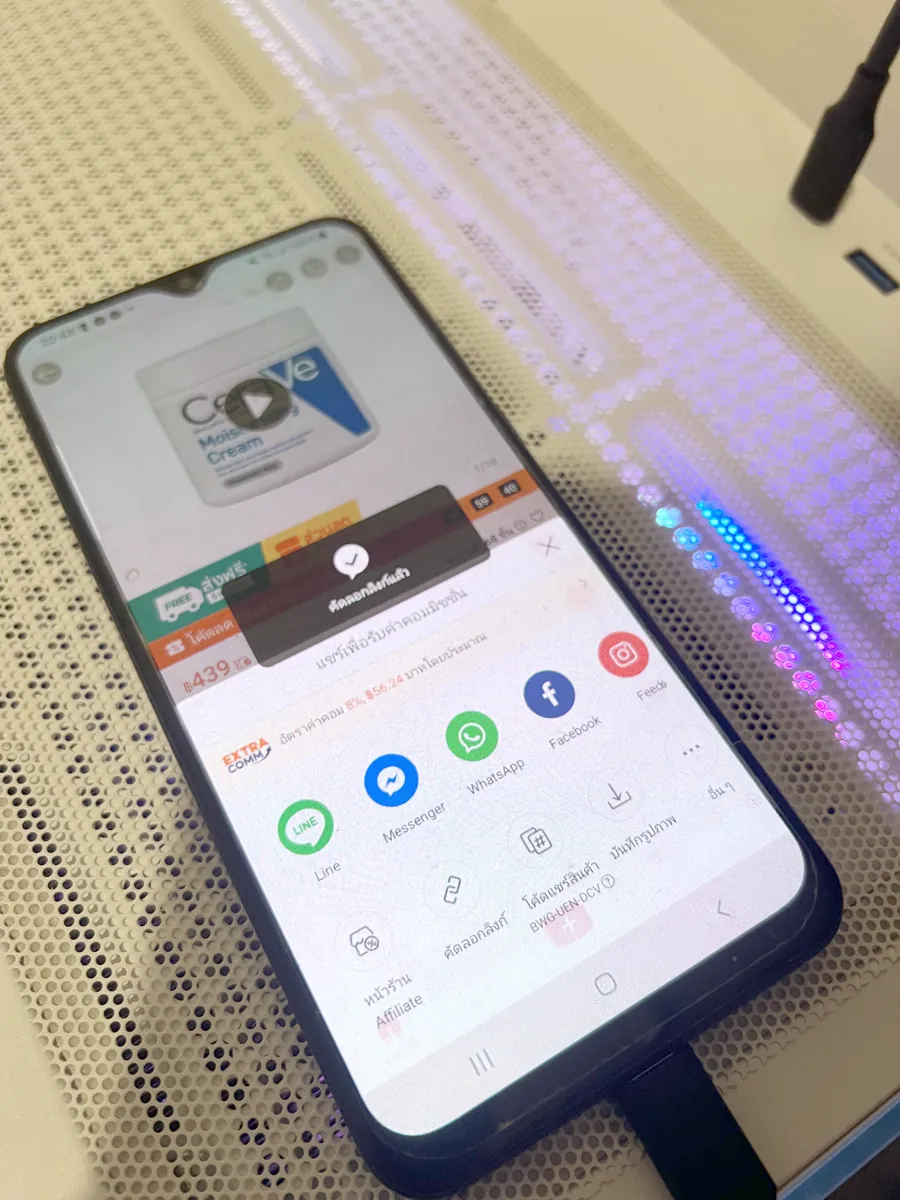
Link copied
8. Set up the phone (tap points)
The app posts to Shopee Video by tapping the phone screen for you, so you show it once where 19 buttons are. Redo it when you change phones or the Shopee app changes its layout.
Turn on USB debugging: Settings → About phone → Software information → tap Build number 7 times → back to Settings → Developer options → USB debugging on. Plug in the USB cable and press Allow on the phone.
Open the มือถือ (phone) menu. The phone appears with “USB connected · ready”. If it says offline, unplug and plug it in again. Press “ตั้งจุดกด” (set tap points).

No phone yet 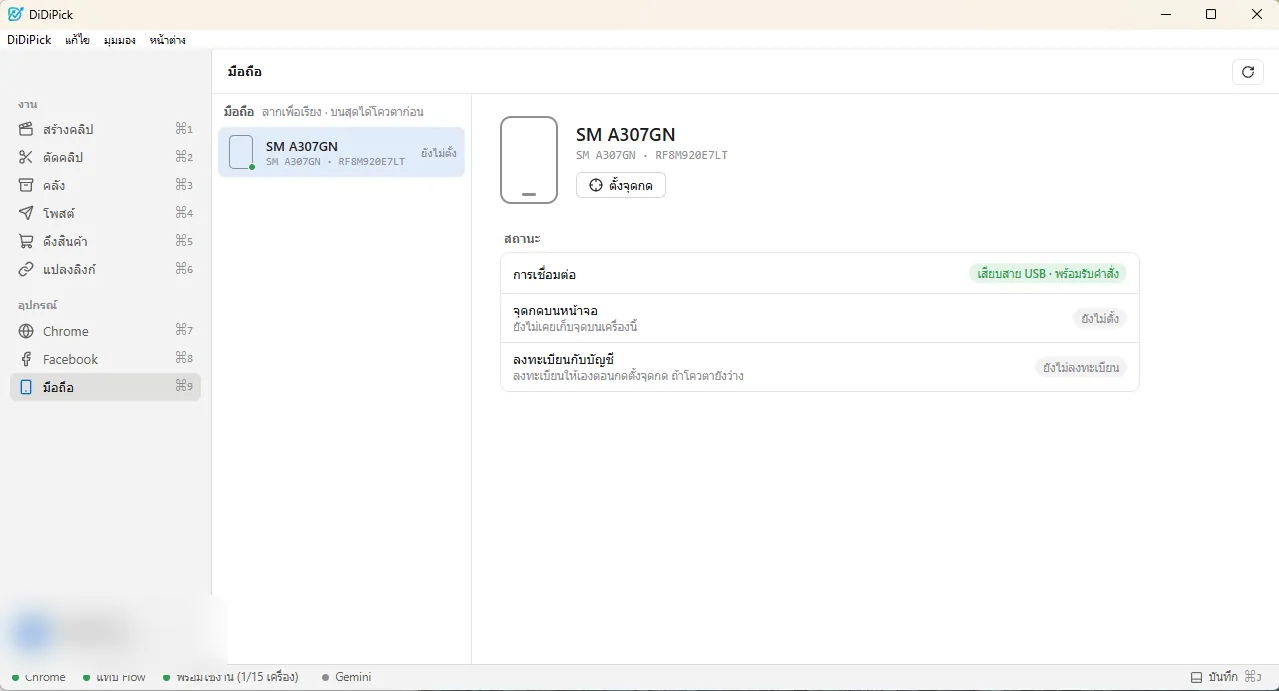
Phone found — press set tap points The middle shows the phone screen; the right lists the 19 points. For each: click the button on the screen image (a blue dot appears) → press “ทดสอบ” (test) so the phone really taps and moves on → check it went to the right screen → press “ยืนยันจุดนี้” (confirm).
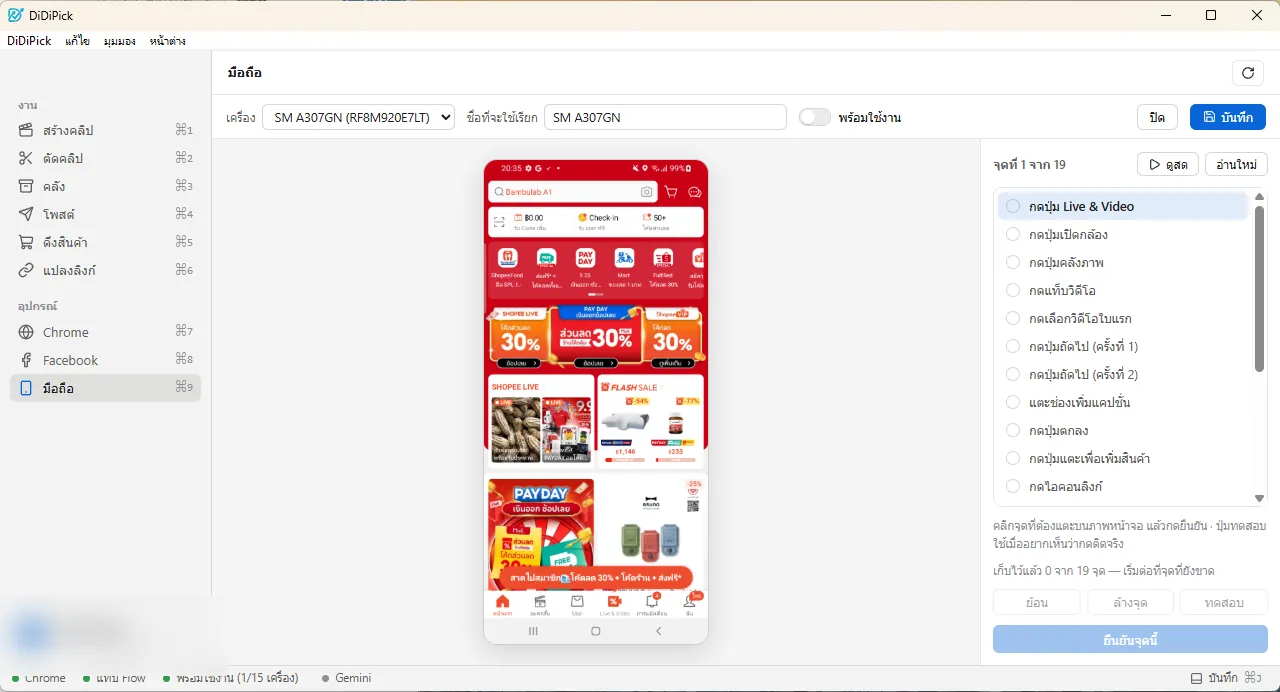
Starting point 1 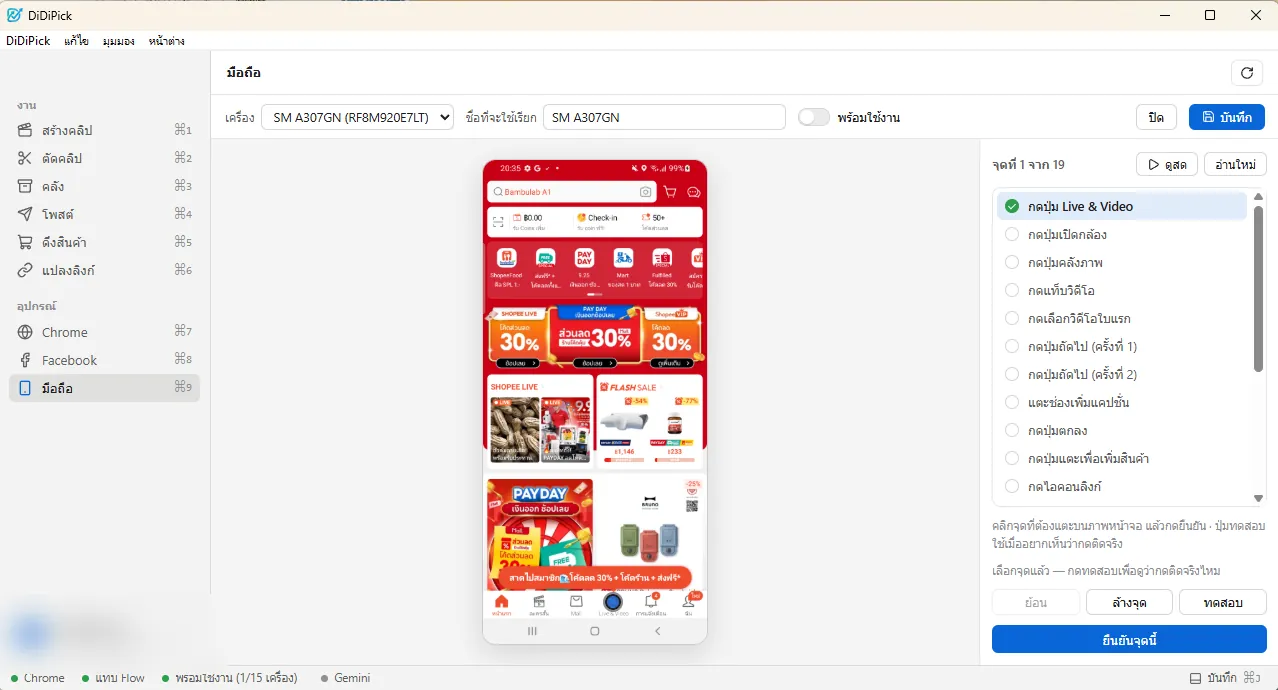
Position picked 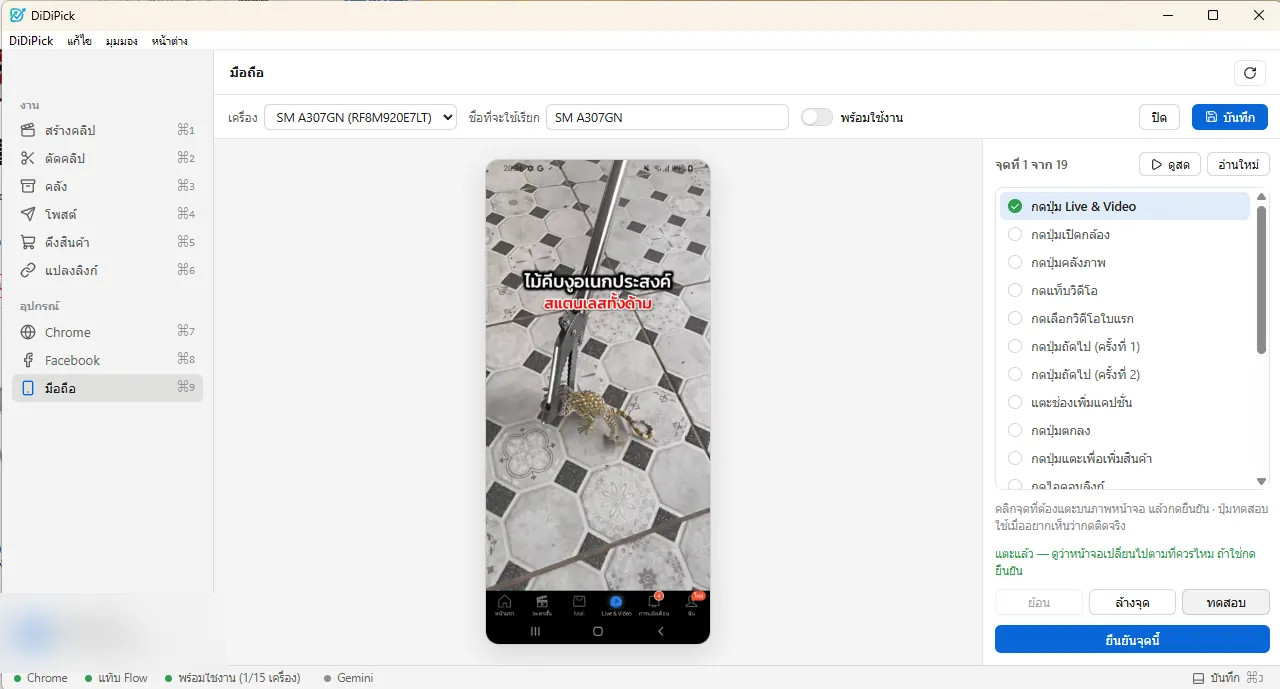
Tested — the phone moved on
Made a mistake? “ล้างจุด” clears the dot, “ย้อน” goes back a point. If the screen image does not match the phone, press “ดูสด” (live) or “อ่านใหม่” (reload).
The last two are Shopee’s Post and Save-draft buttons. Testing them makes the phone really post or save the test clip to your Shopee account. Click exactly on the button in the screen image (18 = the orange Post button, 19 = the draft button to its left) and press “ยืนยันจุดนี้” (confirm) straight away.
Point by point, all 19 — the orange ring is where to click on the screen image
- 1Live & Video buttonกดปุ่ม Live & Video

The middle button of the bottom bar on the Shopee home screen
- 2Open cameraกดปุ่มเปิดกล้อง

The camera icon at the top right of Shopee Video
- 3Gallery buttonกดปุ่มคลังภาพ
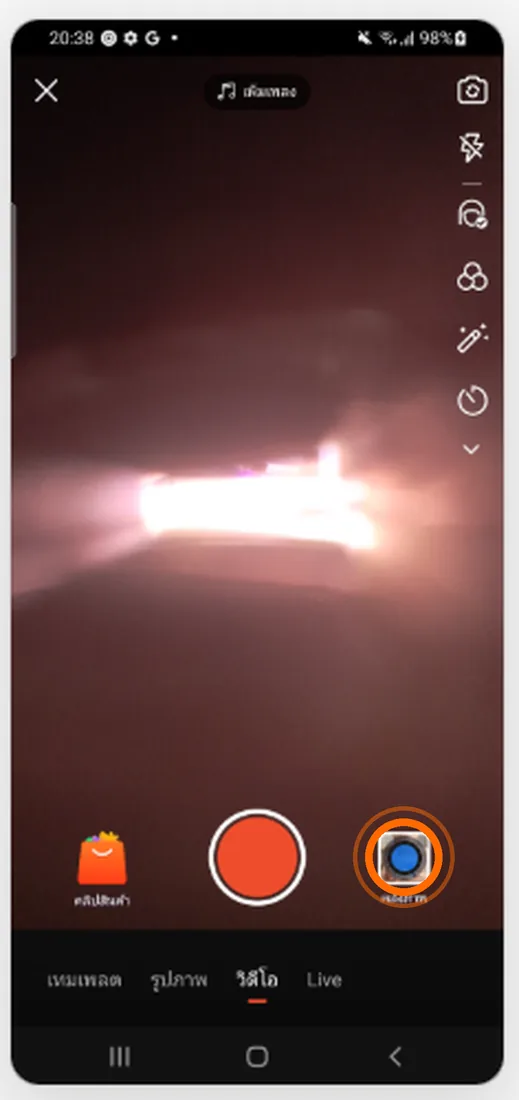
The small thumbnail right of the red record button
- 4Video tabกดแท็บวิดีโอ

The middle tab at the top of the gallery
- 5Pick the first videoกดเลือกวิดีโอใบแรก
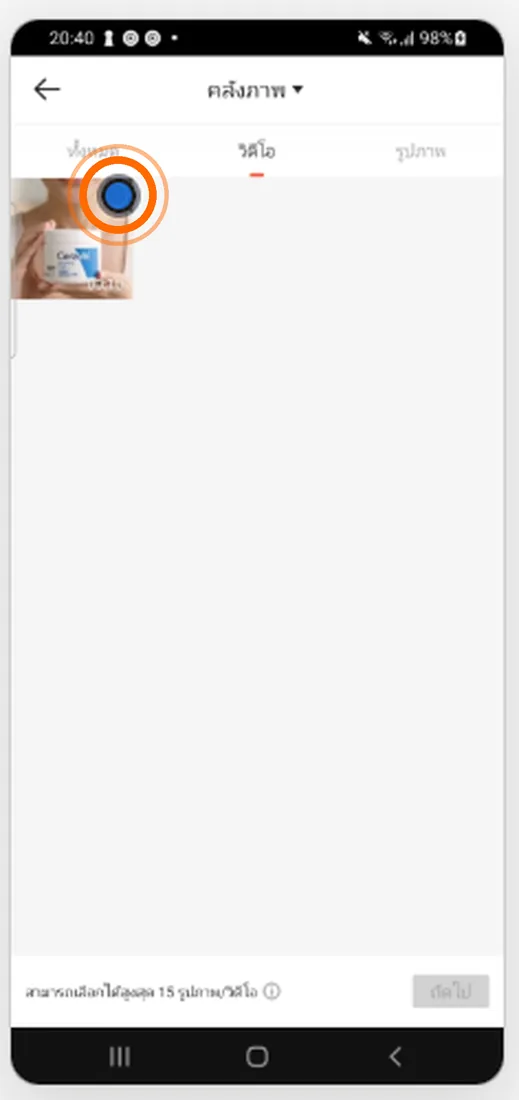
The circle on the first video (top left)
- 6Next (1st)กดปุ่มถัดไป (ครั้งที่ 1)
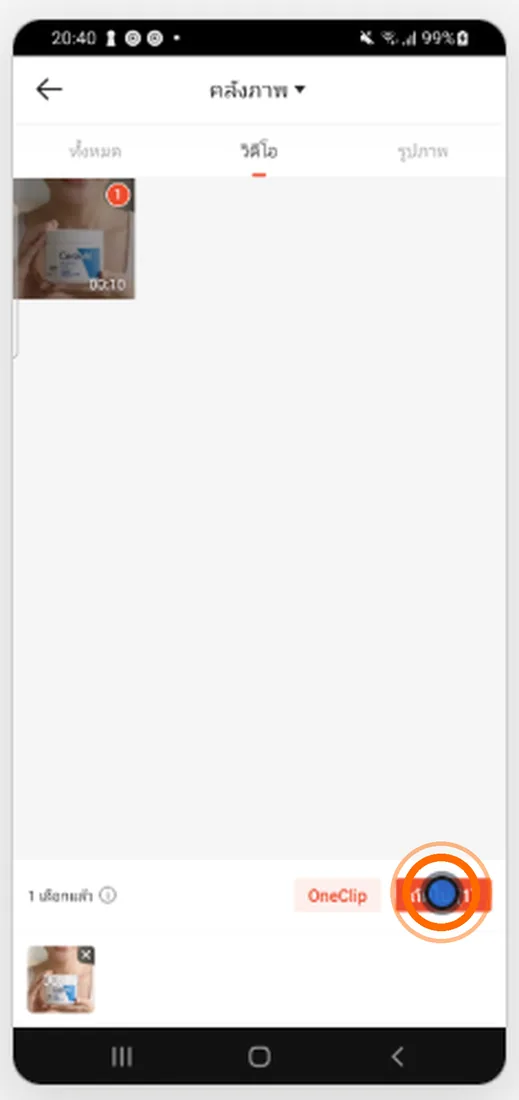
The orange button at the bottom right
- 7Next (2nd)กดปุ่มถัดไป (ครั้งที่ 2)
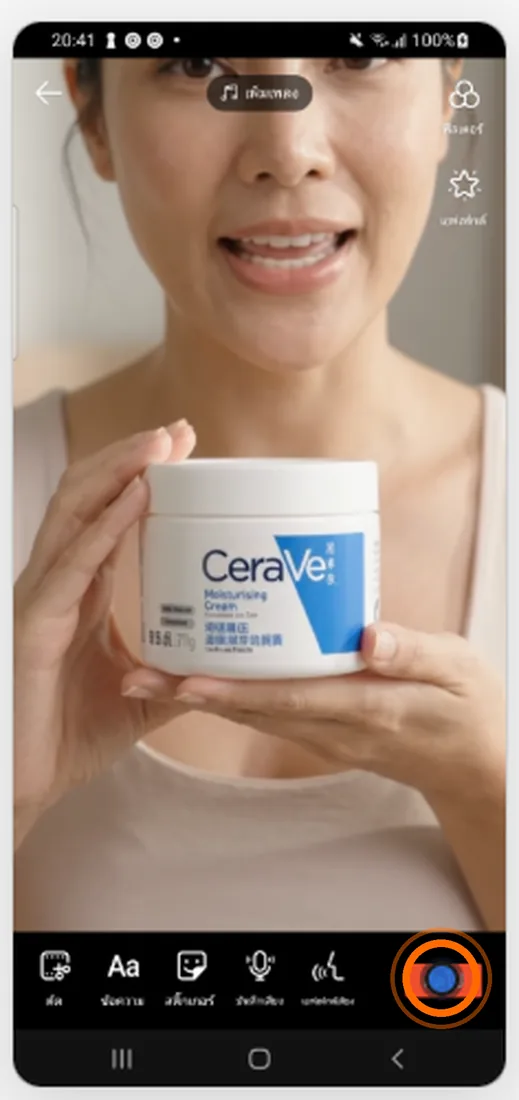
The bottom-right button on the edit screen
- 8Caption boxแตะช่องเพิ่มแคปชั่น

The text box next to the cover picture
- 9OKกดปุ่มตกลง

Top right while the keyboard is open
- 10Tap to add productกดปุ่มแตะเพื่อเพิ่มสินค้า
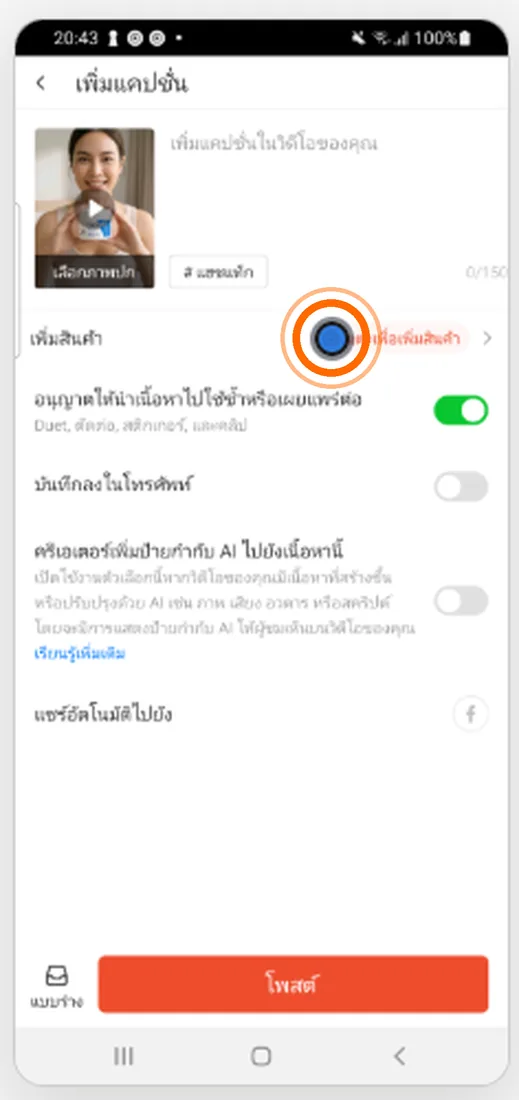
The red text on the “เพิ่มสินค้า” row
- 11Link iconกดไอคอนลิงก์
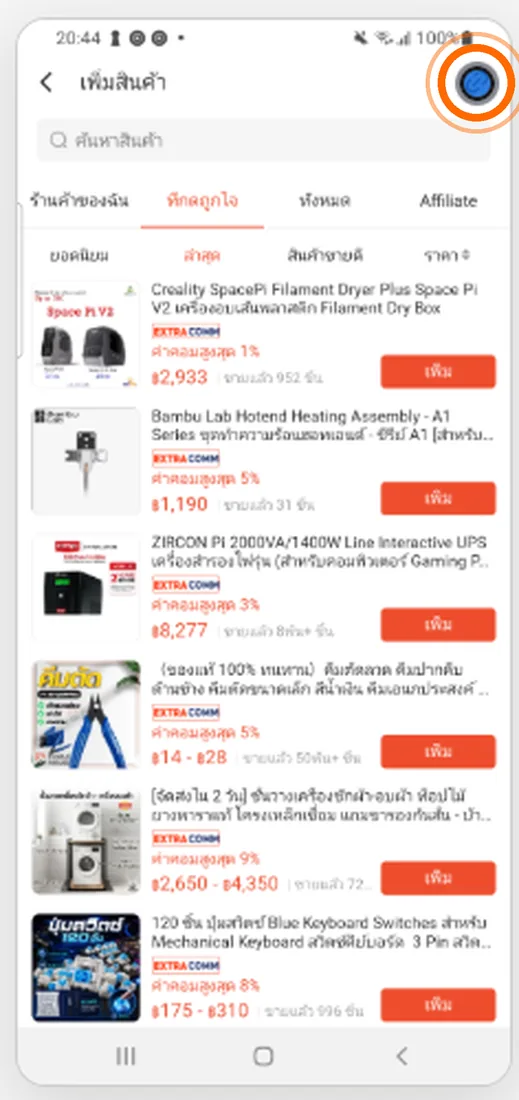
The link icon at the top right of the add-product screen
- 12Product link boxแตะช่องวางลิงก์สินค้า
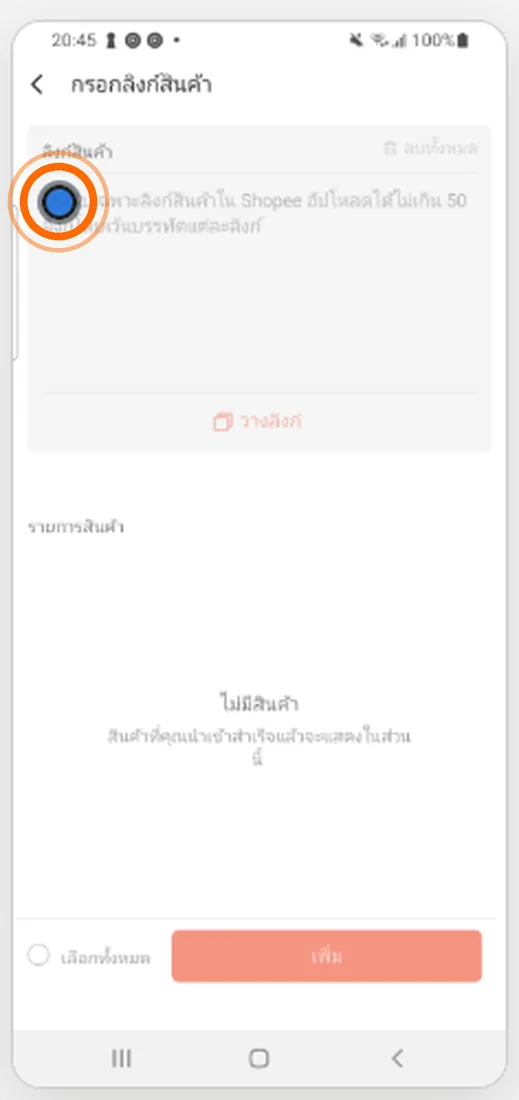
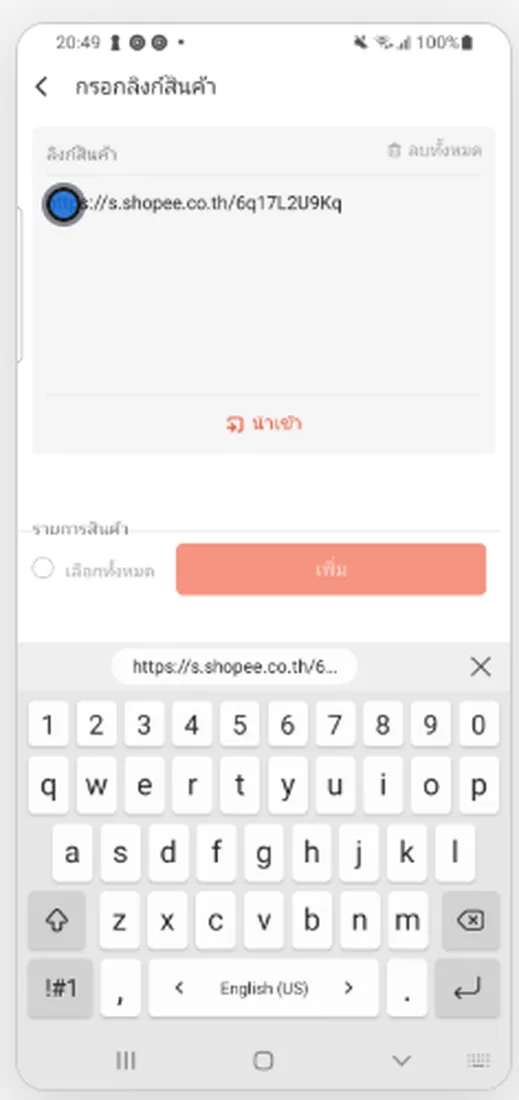
Click the box → test → paste the link yourself on the phone (long-press, Paste) → once the link shows, confirm
- 13Importกดปุ่มนำเข้า
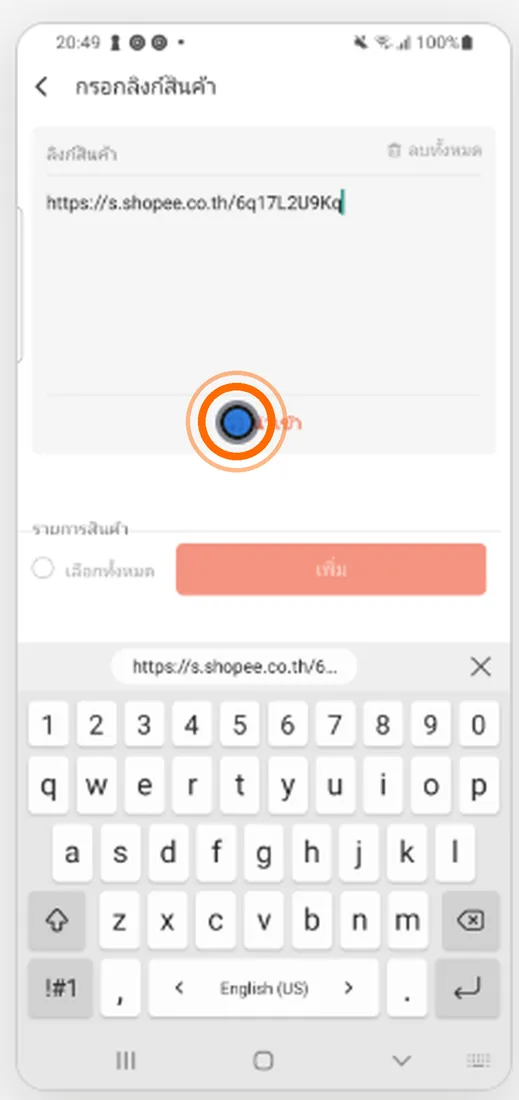
The import button under the link box
- 14Tick the first productติ๊กเลือกสินค้าชิ้นแรก
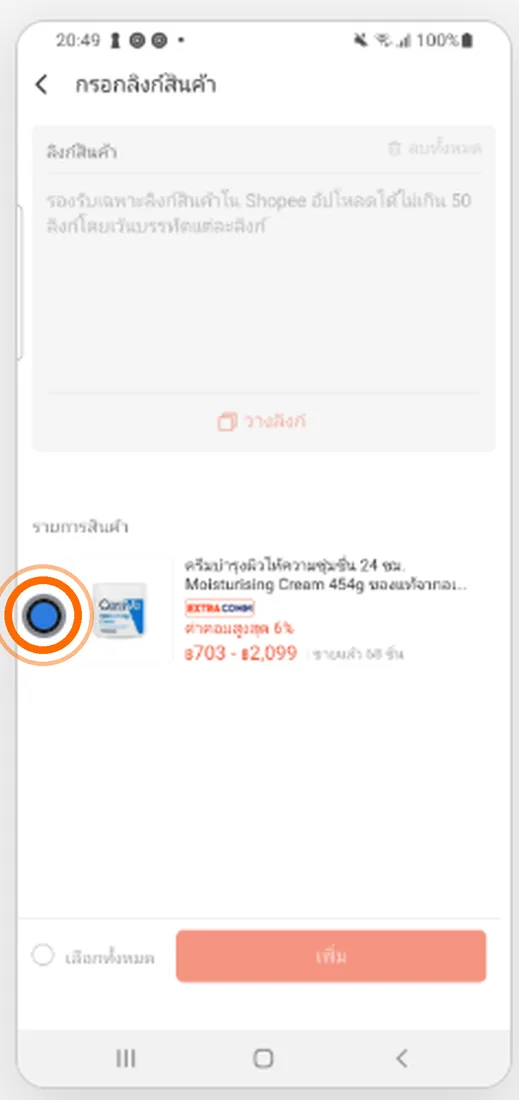
The circle in front of the imported product
- 15Addกดปุ่มเพิ่ม
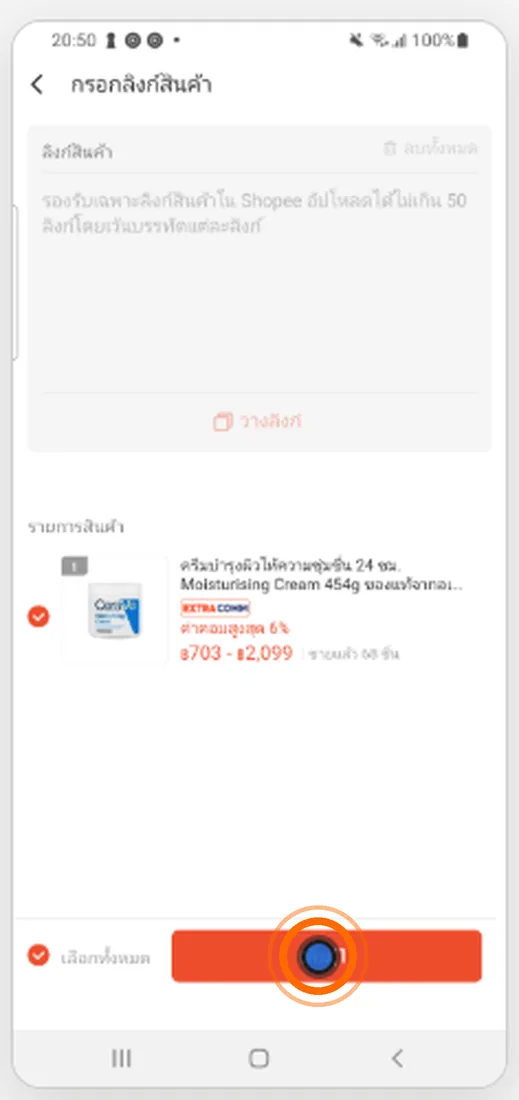
The orange button at the bottom
- 16Turn off content reuseปิดอนุญาตให้นำเนื้อหาไปใช้ซ้ำ

The first switch, “allow content reuse…”
- 17Turn on the AI labelเปิดป้ายกำกับ AI
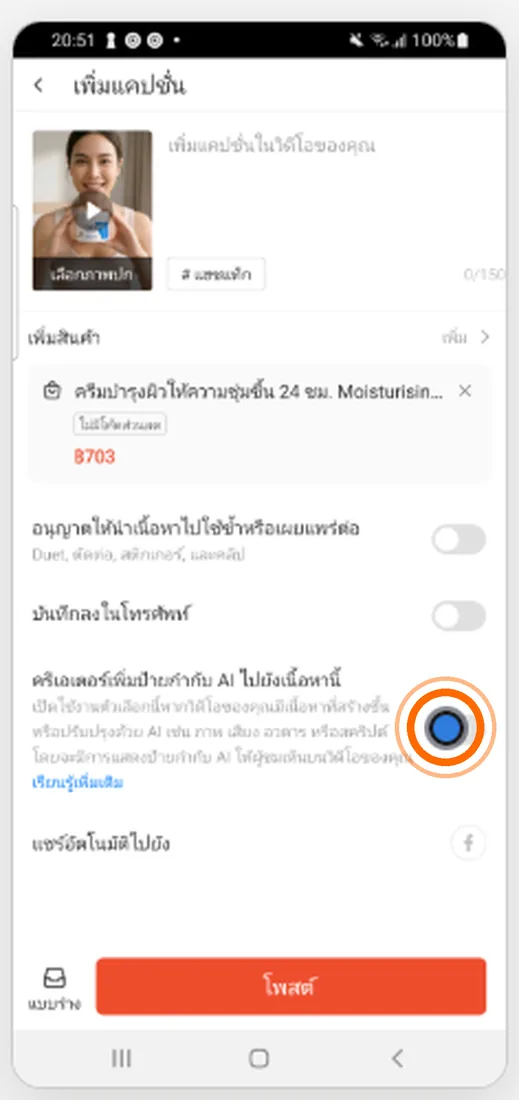
The switch on the “creator adds an AI label…” row
- 18Post nowกดปุ่มโพสต์เลย

⚠ The orange Post button. Click it exactly and confirm — do not test
- 19Save as draftกดปุ่มบันทึกแบบร่าง
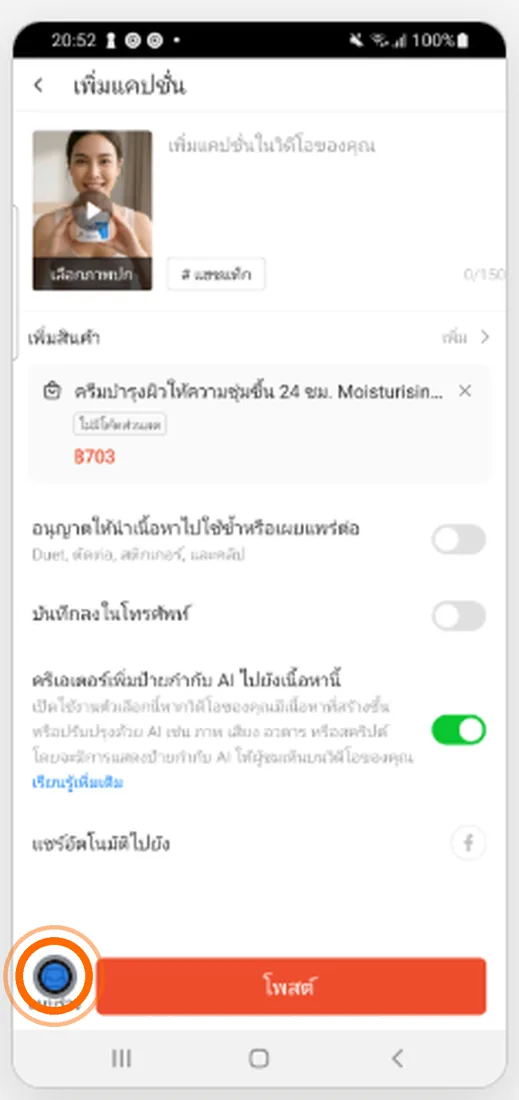
⚠ The draft icon left of Post. Click it exactly and confirm — do not test
With all 19 done, turn on “พร้อมใช้งาน” (ready) at the top and press “บันทึก” (save). A green note says the phone is saved and now shows in DiDiPick.
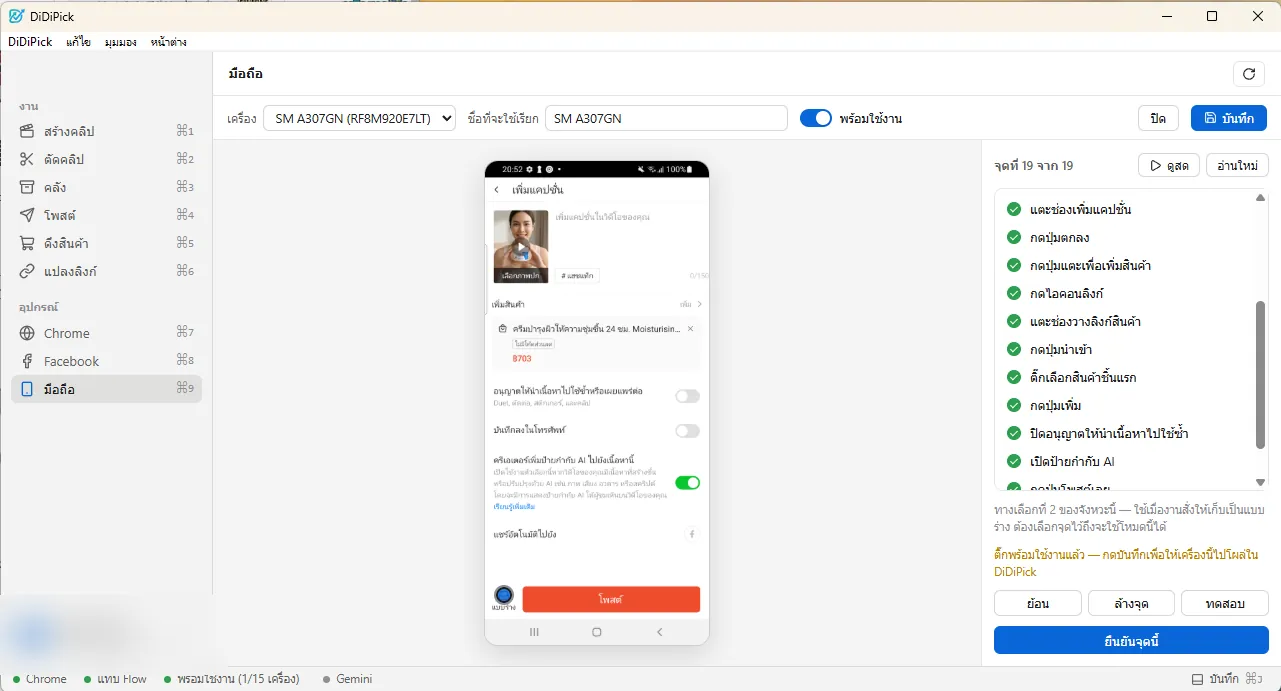
Ready switch on 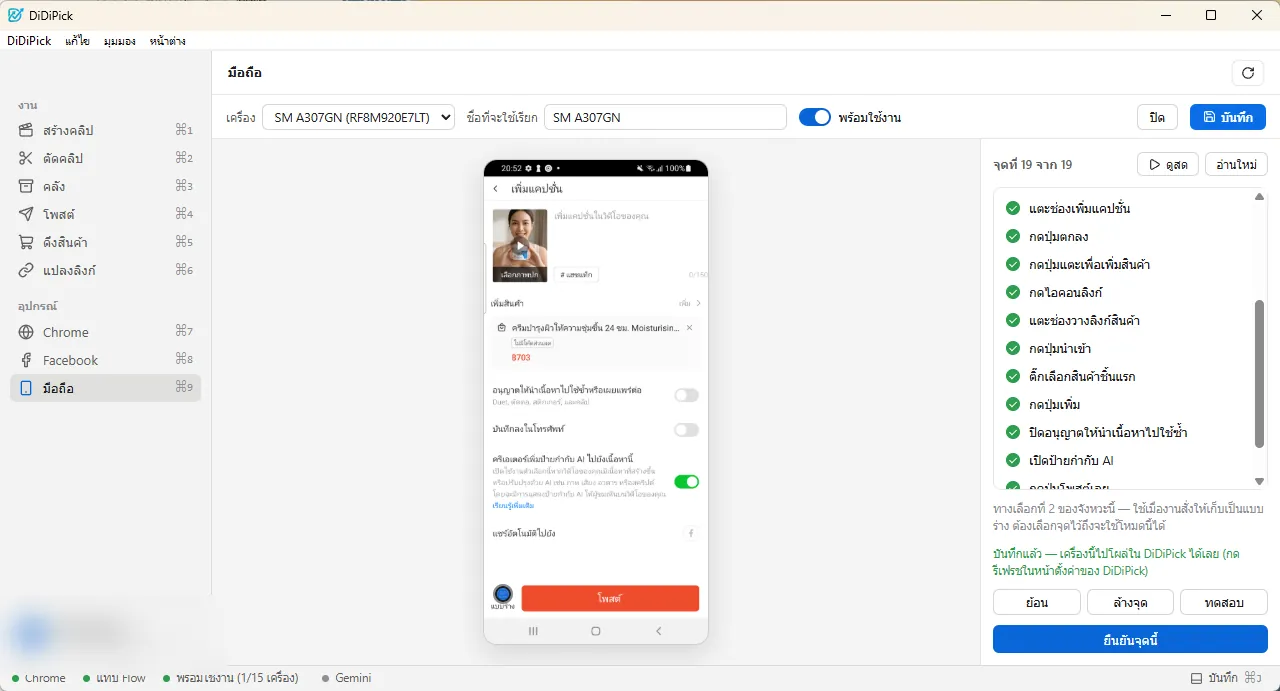
Saved The phone page now shows tap points ready and registered. The phone is ready to post.
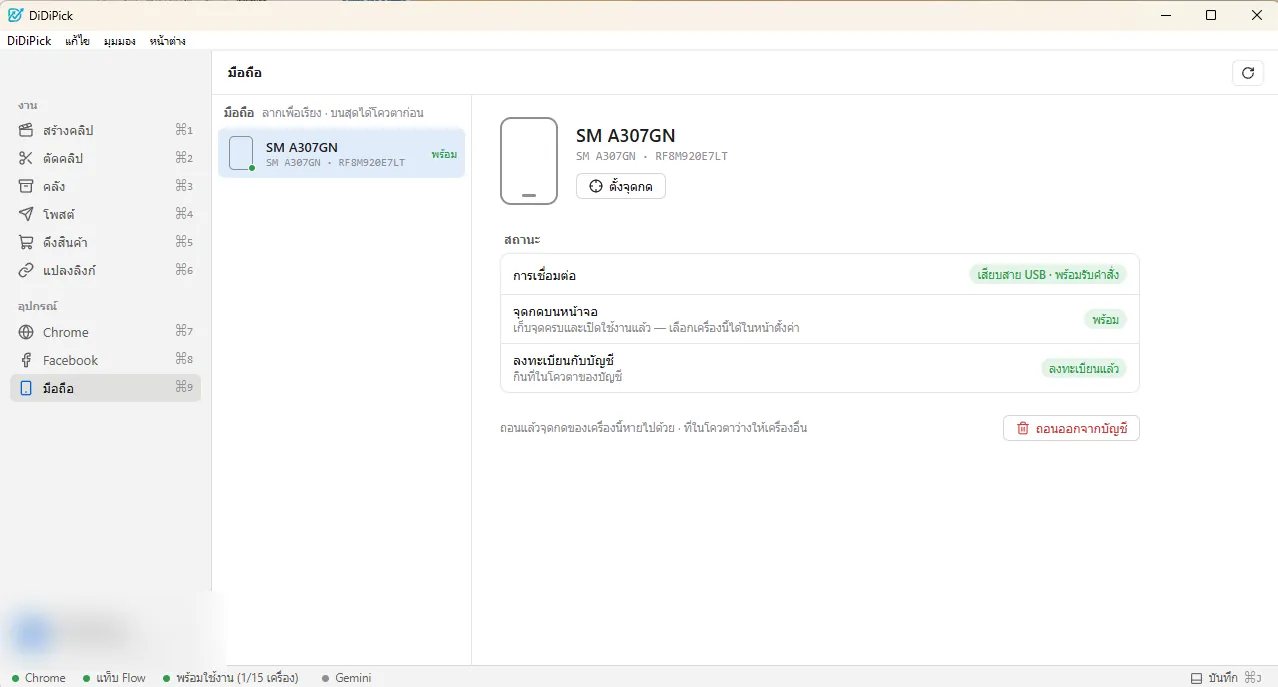
Phone ready
9. Pull products from Shopee Affiliate
Open ดึงสินค้า (pull products). Press “ข้อเสนอผลิตภัณฑ์” (product offers) or “ข้อเสนอพิเศษ” (special offers); the page opens in your pull-products Chrome.
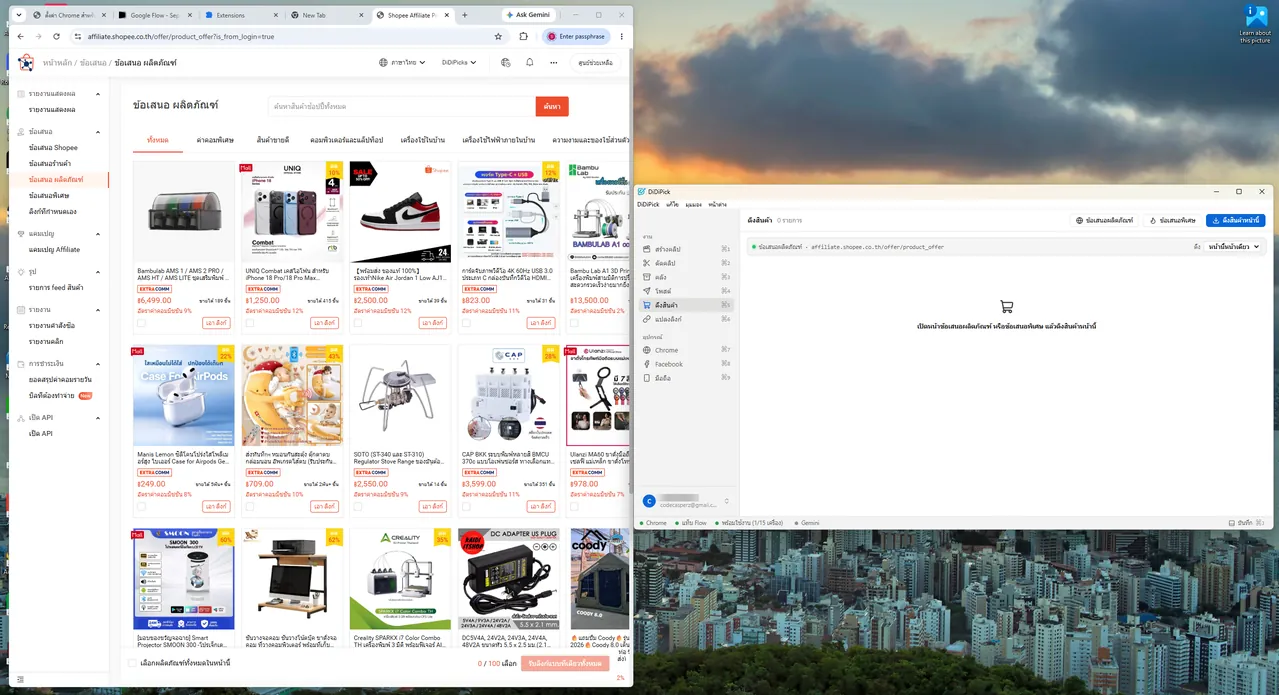
Product offers in Chrome Choose how many pages to pull (this page only up to 20) and press “ดึงสินค้าหน้านี้” (pull this page). Wait for the pictures and links to finish.
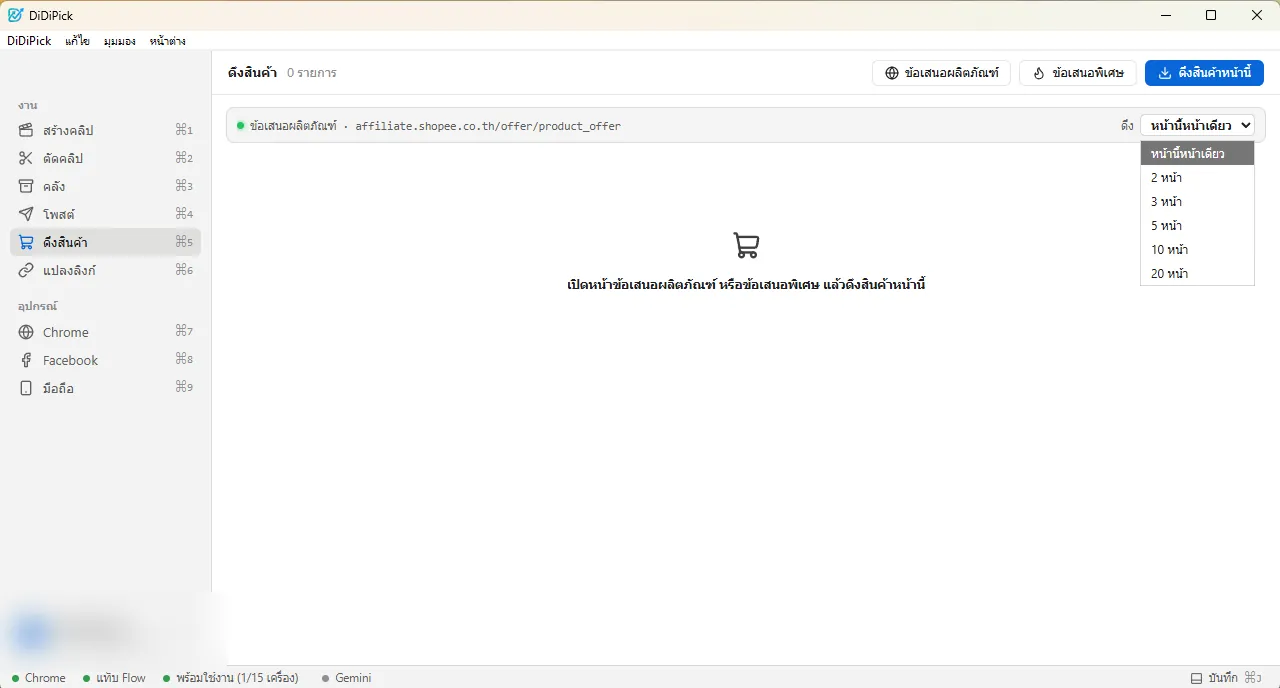
How many pages 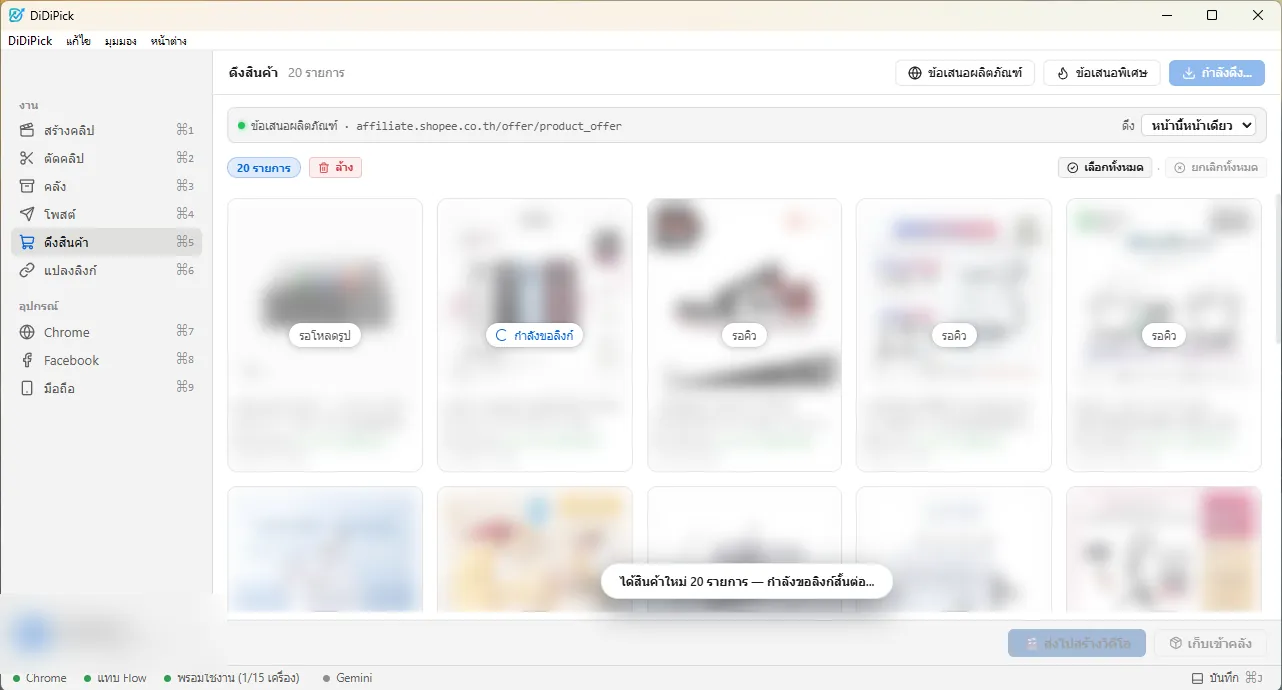
Pulling and making links Click the products you want clips for (or select all), then press “ส่งไปสร้างวิดีโอ” (send to create) or “เก็บเข้าคลัง” (keep in library) for later.

Pulled 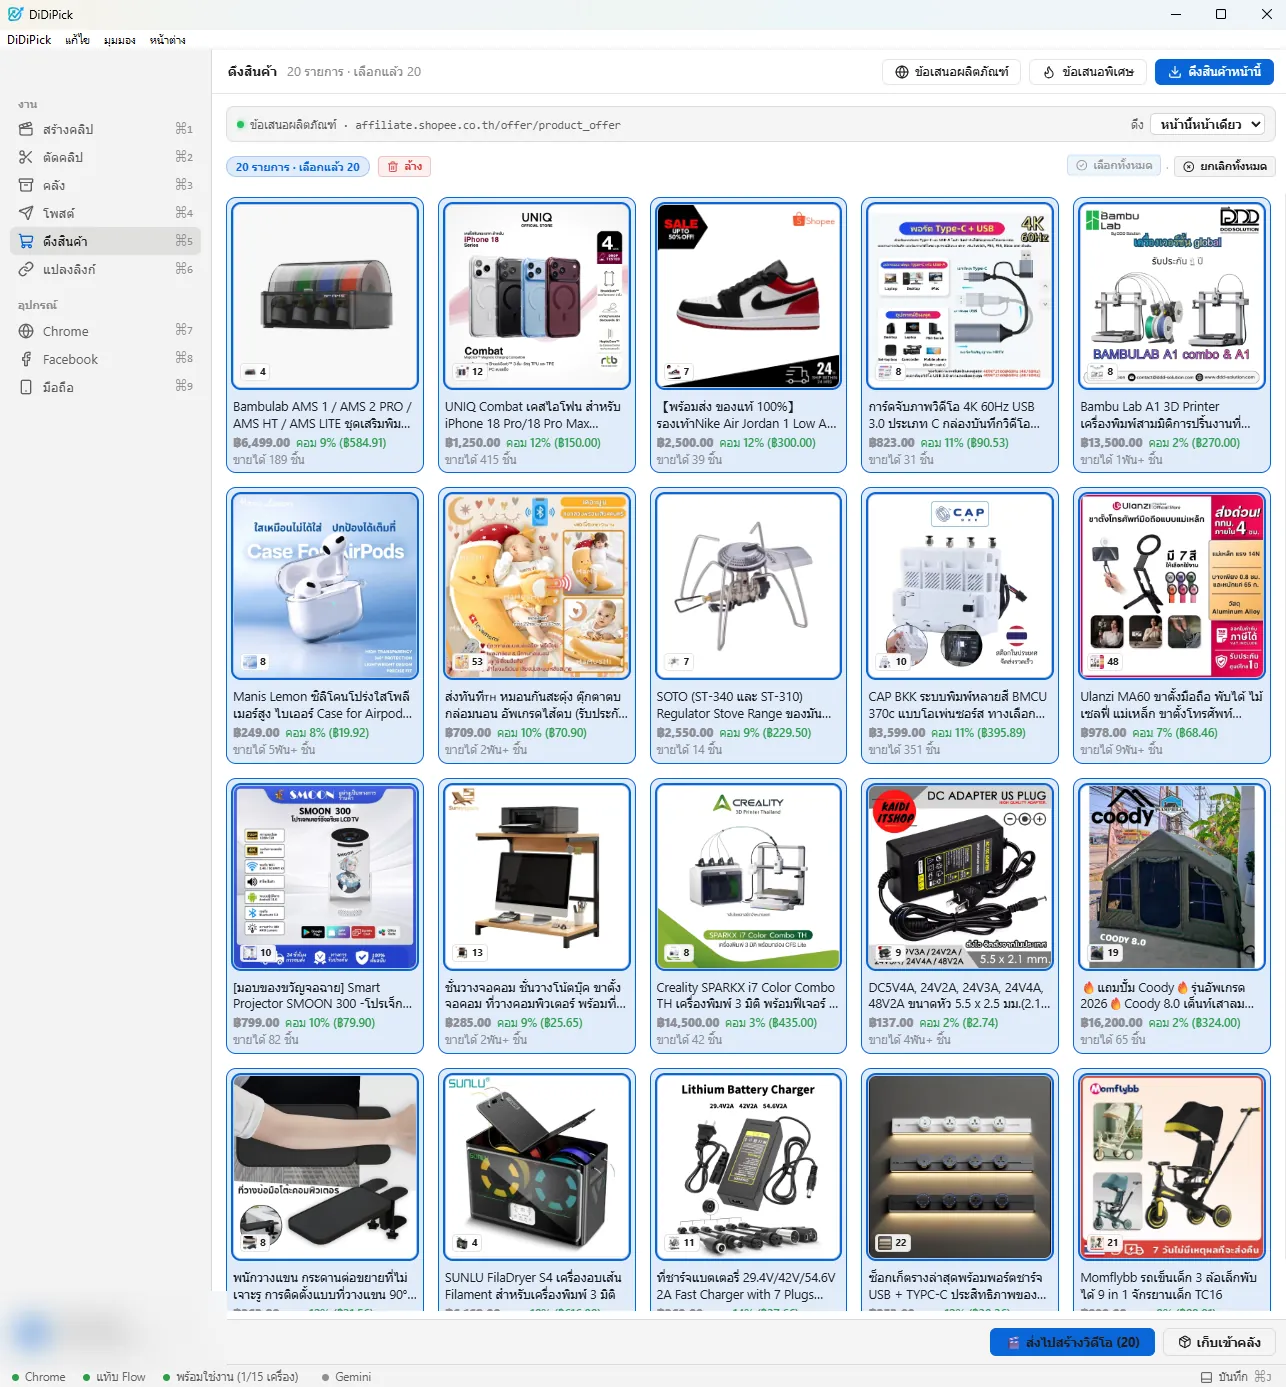
Products selected
10. Create a Gemini API key (for AI scripts)
Needed for Director mode (AI studies the product, writes the script and directs the scenes). Quick mode uses ready-made templates and needs no key.
Search for “Google AI Studio” or go to aistudio.google.com and sign in with Google.
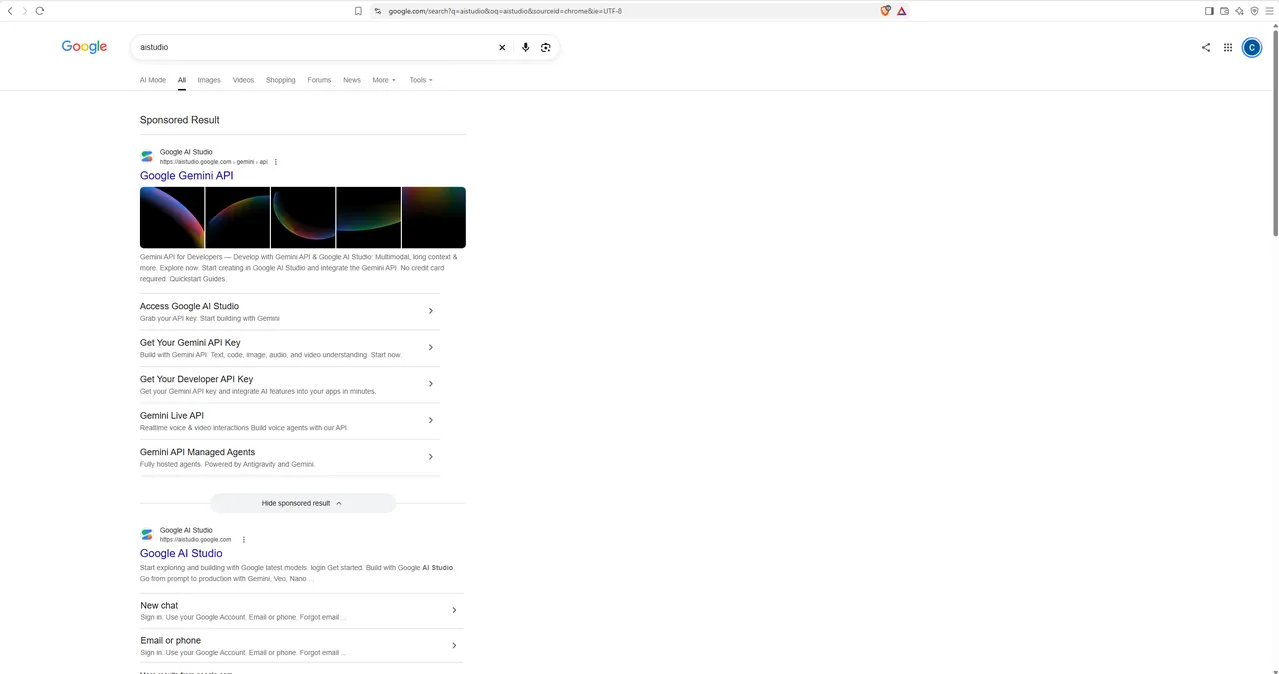
Search Google AI Studio 
Google AI Studio Open API Keys → Create API key → name it and pick a project → Create key → copy the key.

API Keys page 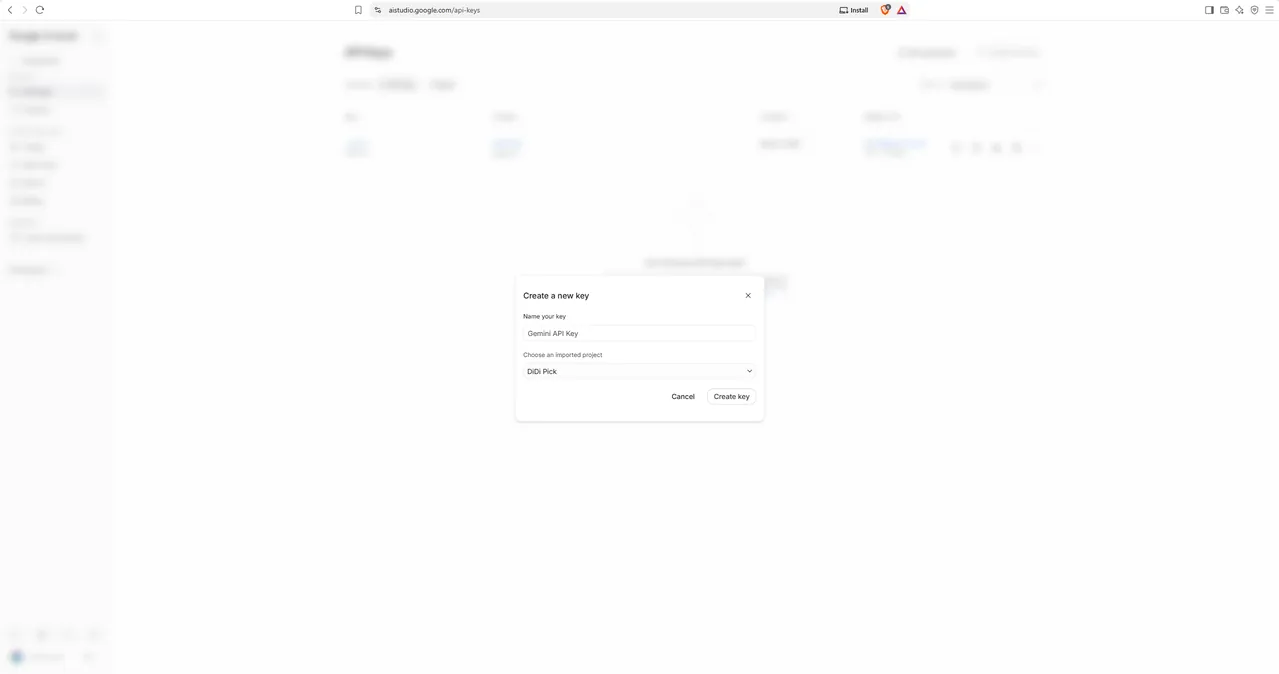
Create a new key In the app click your name at the bottom left → ตั้งค่า (settings) → AI. Paste the key into API Key and press “ทดสอบการเชื่อมต่อ” (test connection). A green success line means it works.
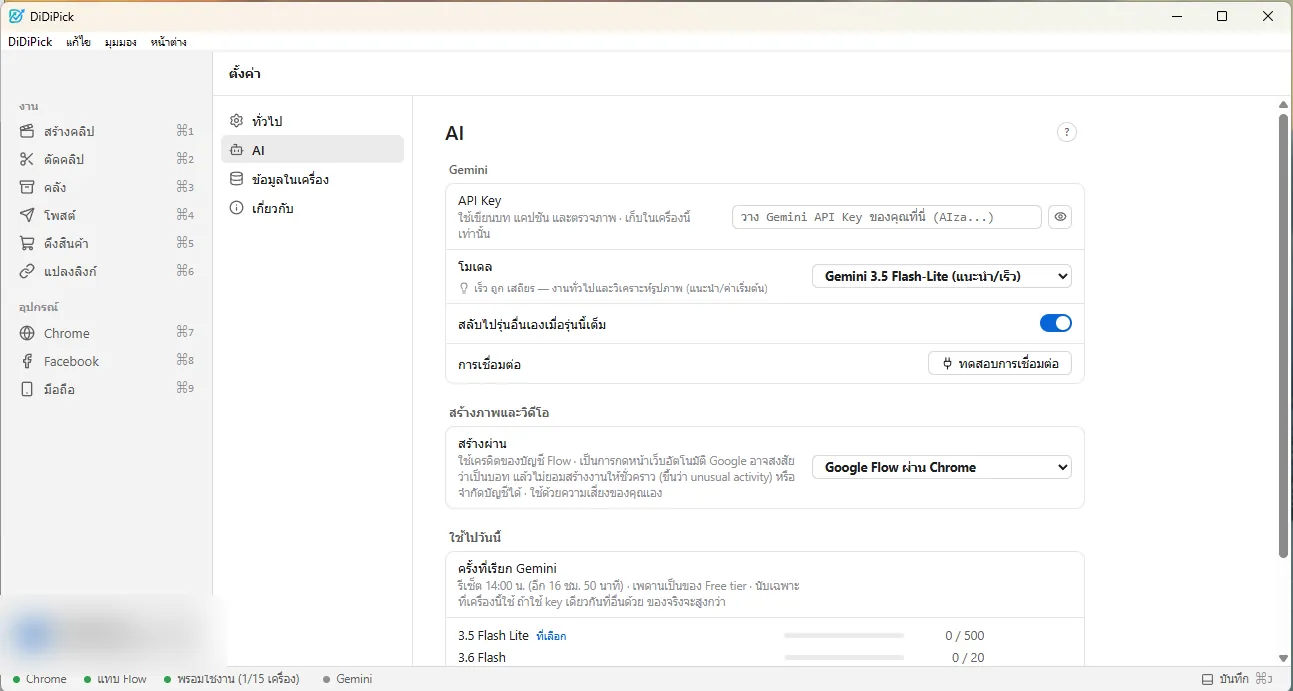
The API Key field 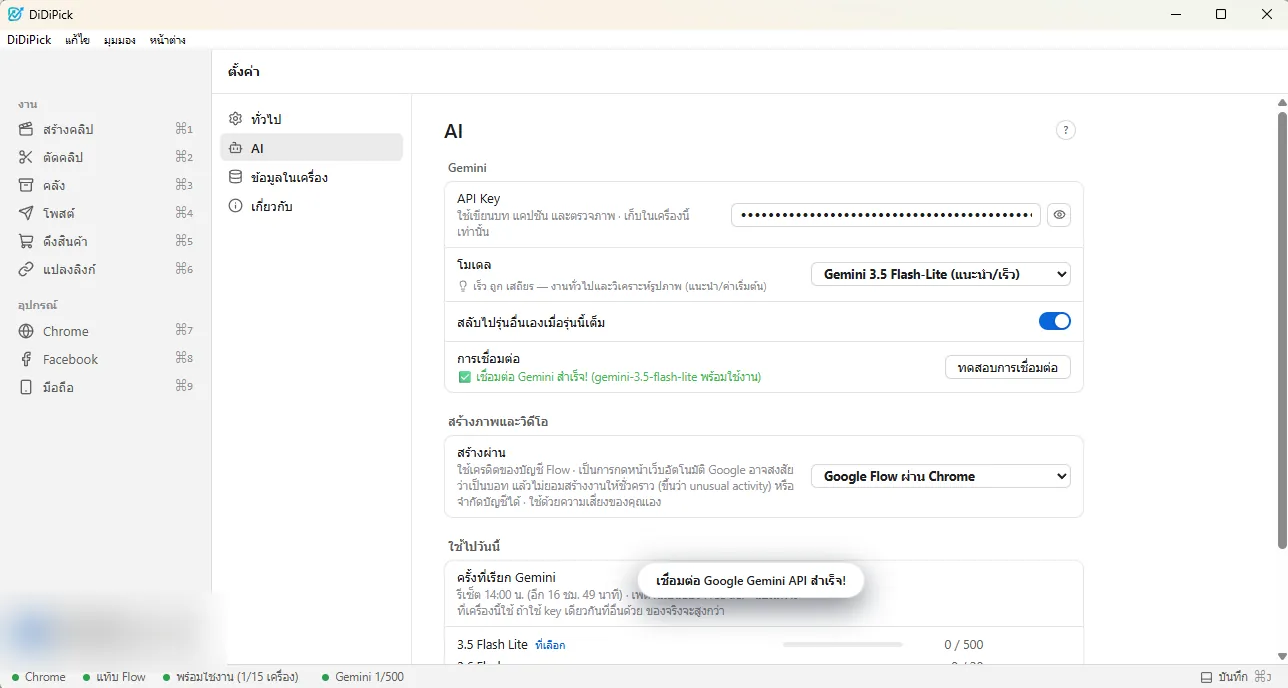
Gemini connected
The key stays on your computer and is never sent to DiDiPick’s servers. Do not share it. “ใช้ไปวันนี้” (used today) on the same page shows your remaining quota.
11. Make clips
Open สร้างคลิป (make clips). Products you sent are queued on the left — drag to reorder. Add more with “+ เพิ่มสินค้า” or “จากคลัง” (from library).
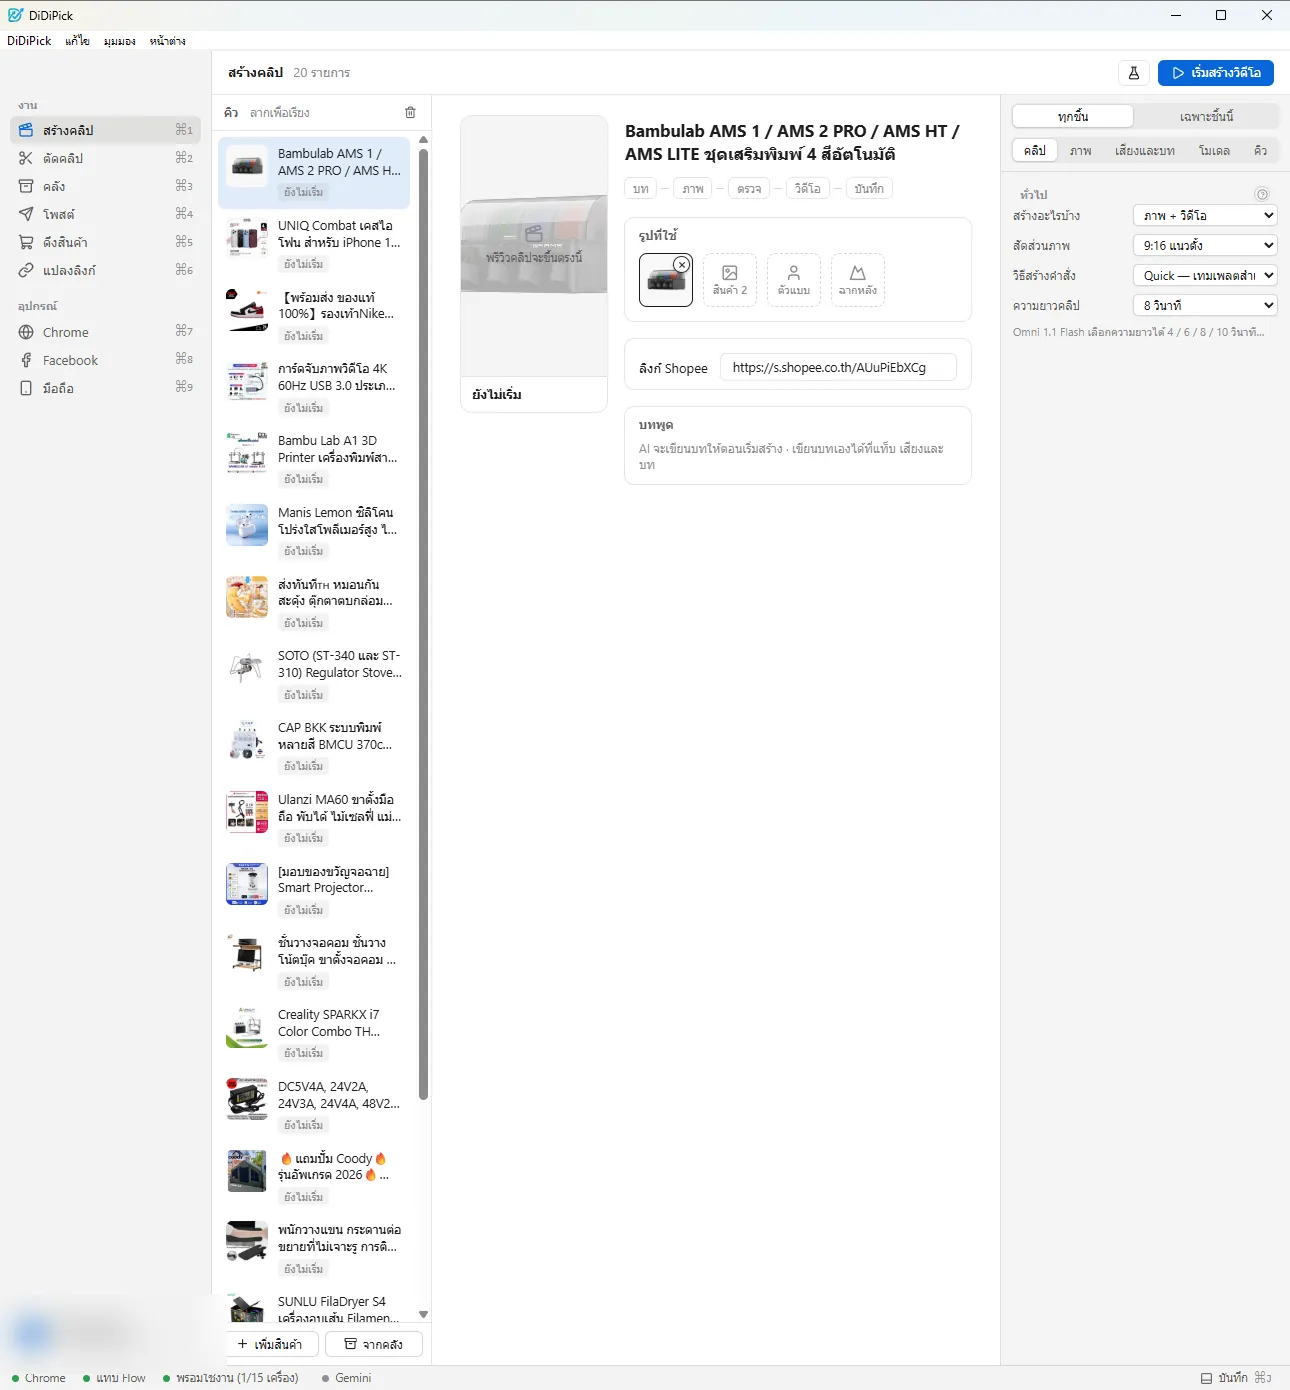
The clip queue Press the picture under “รูปที่ใช้” (images used) to choose which product photos the AI uses. You can add a second product, a model or a background.
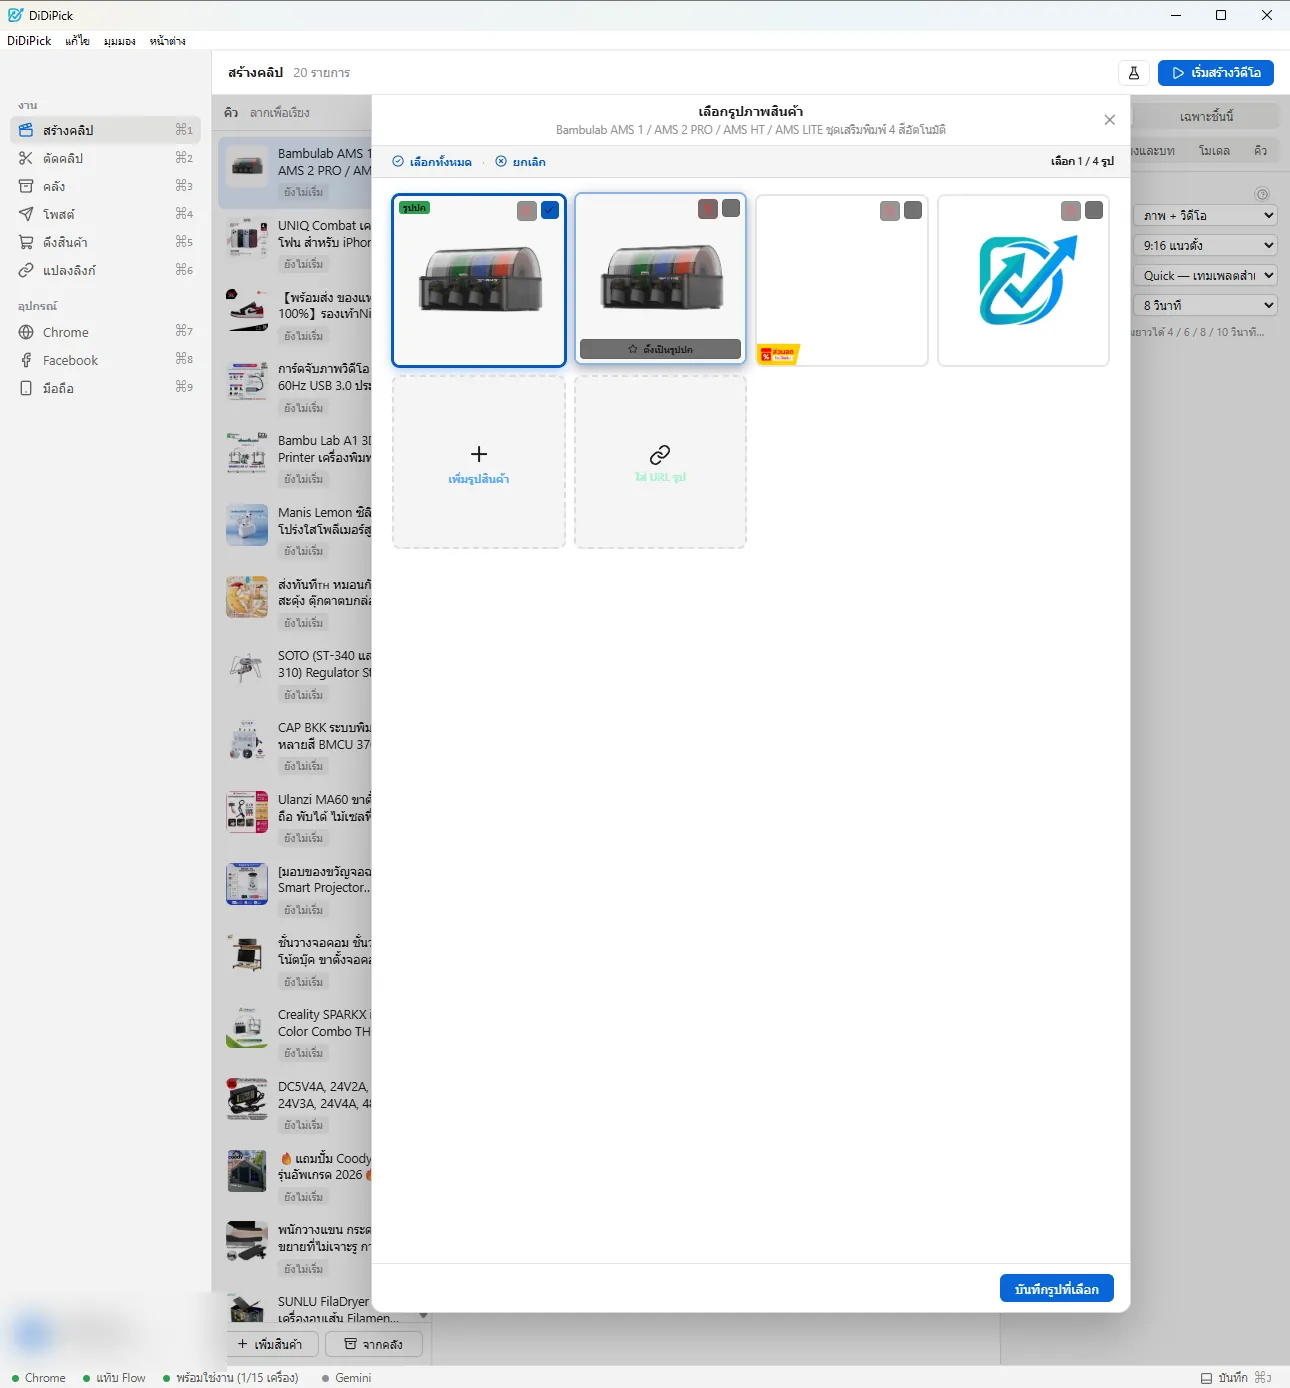
Choose product photos Settings on the right: “ทุกชิ้น” applies to every product, “เฉพาะชิ้นนี้” to the selected one. The คลิป tab sets what to make (image + video), aspect (9:16 vertical), how prompts are made, and clip length.
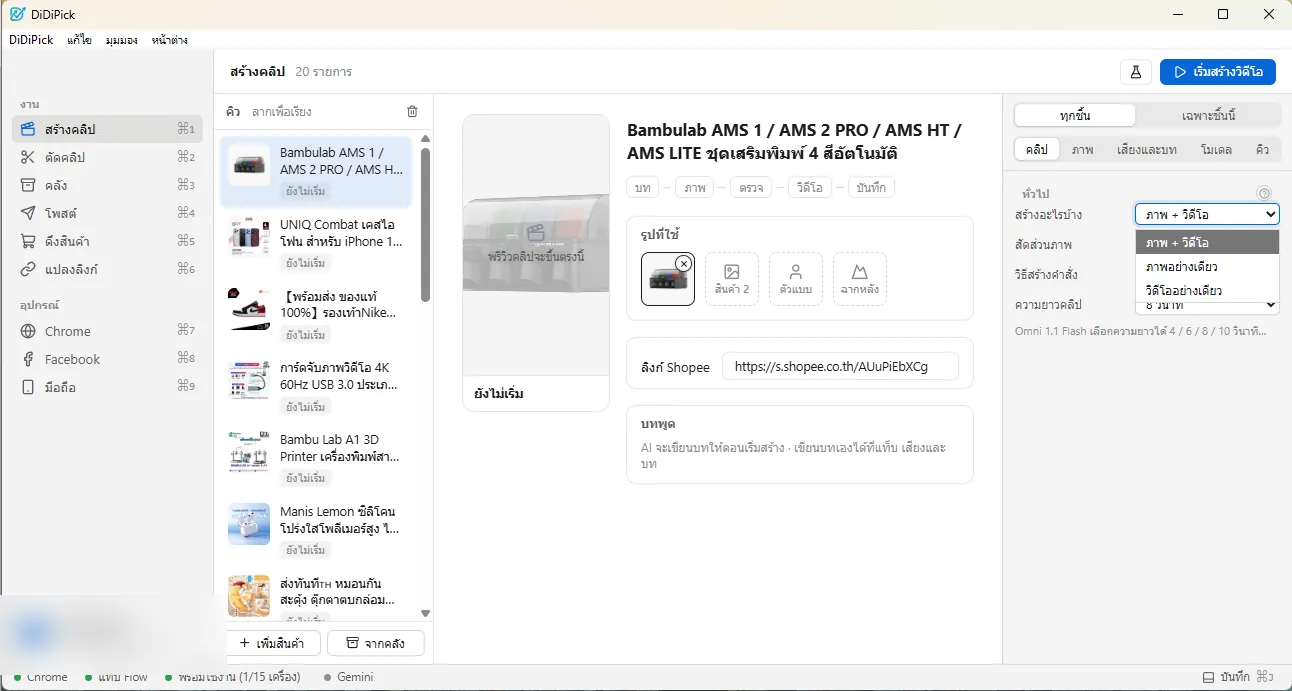
What to make 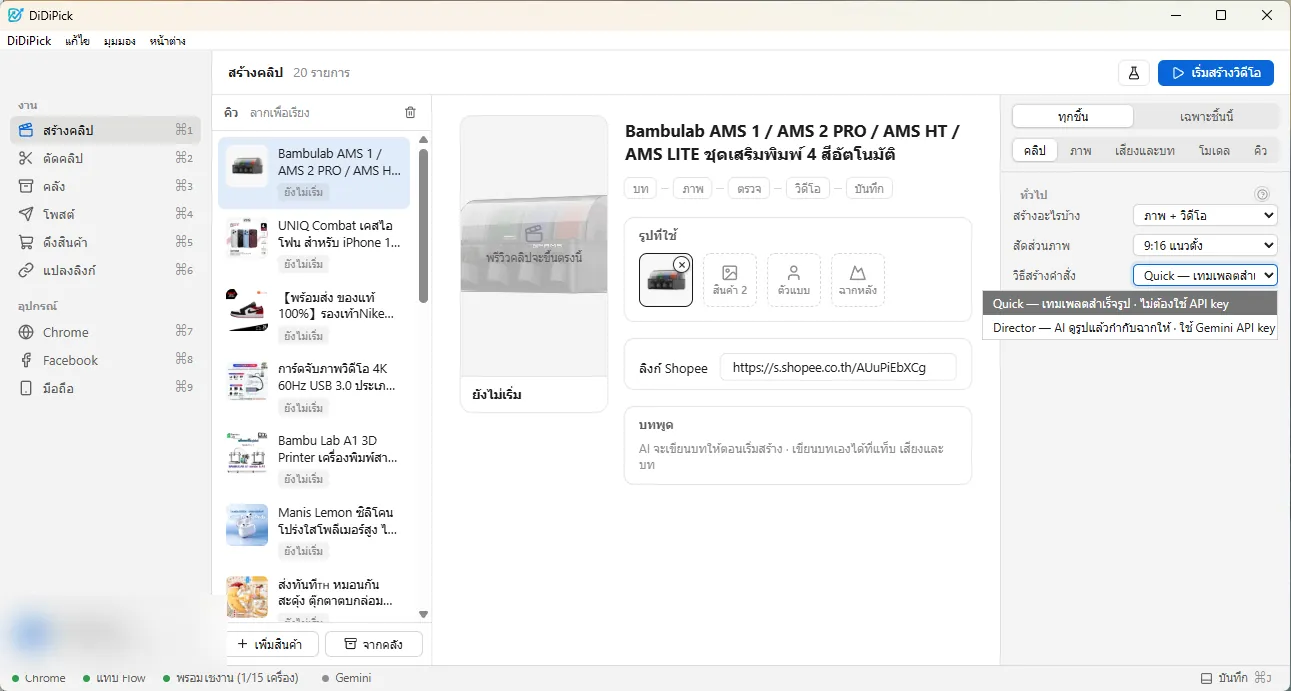
Quick or Director Prompt method: Quick = ready-made templates, no key. Director = AI studies the product and directs the scenes; needs a Gemini API key (section 10).

Choose Director Other tabs — ภาพ: people, pose, scene, light, camera. เสียงและบท: voice, subtitles, script tone. โมเดล: Flow’s video and image models. คิว: retry when Flow fails, and the clip folder.

Image tab 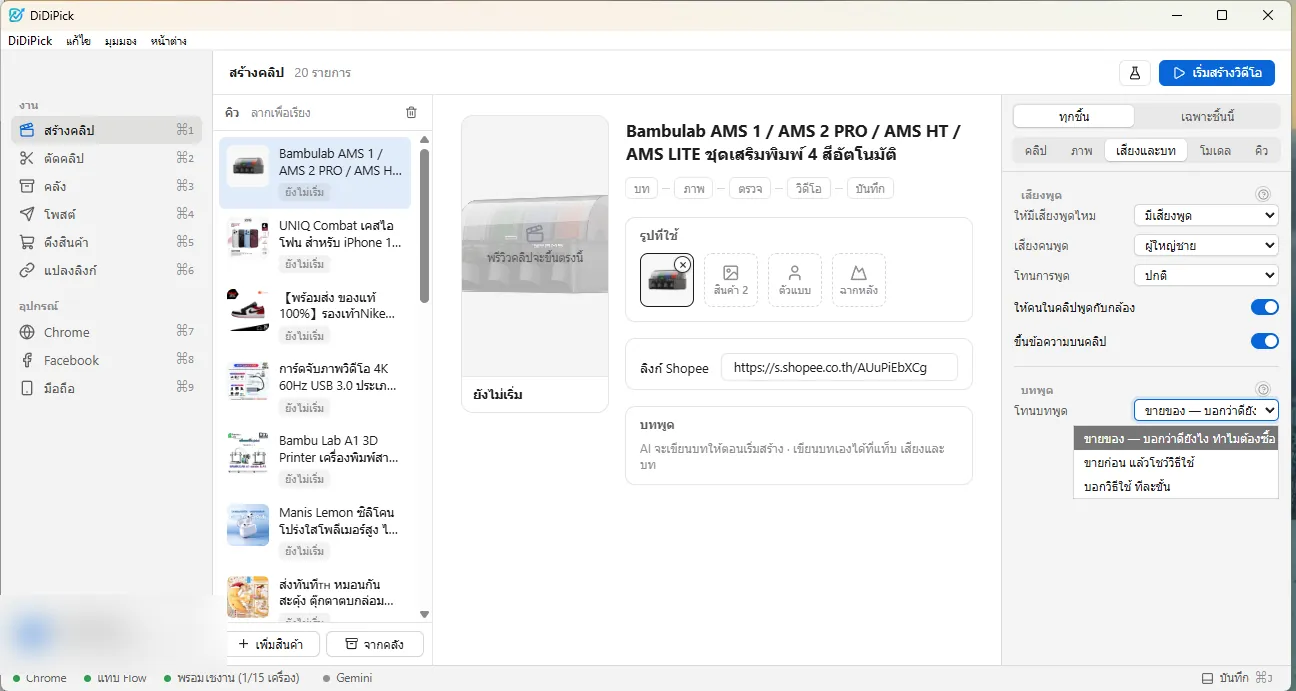
Voice and script tab 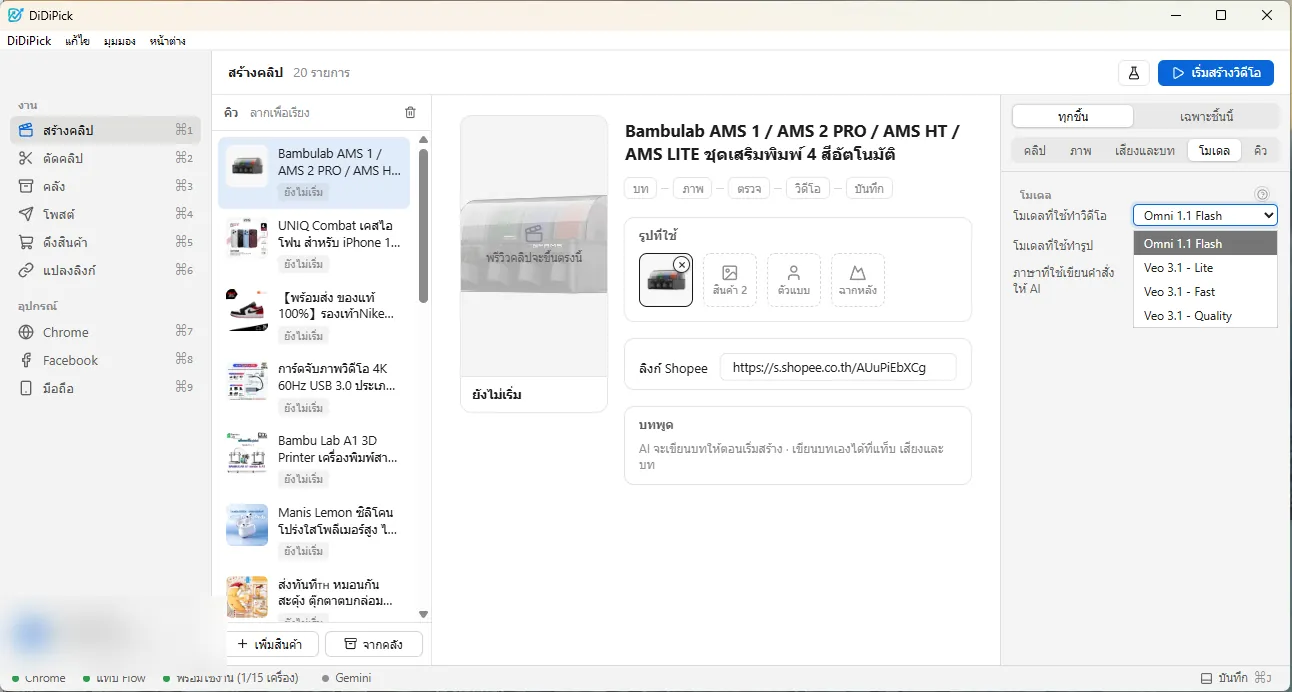
Model tab 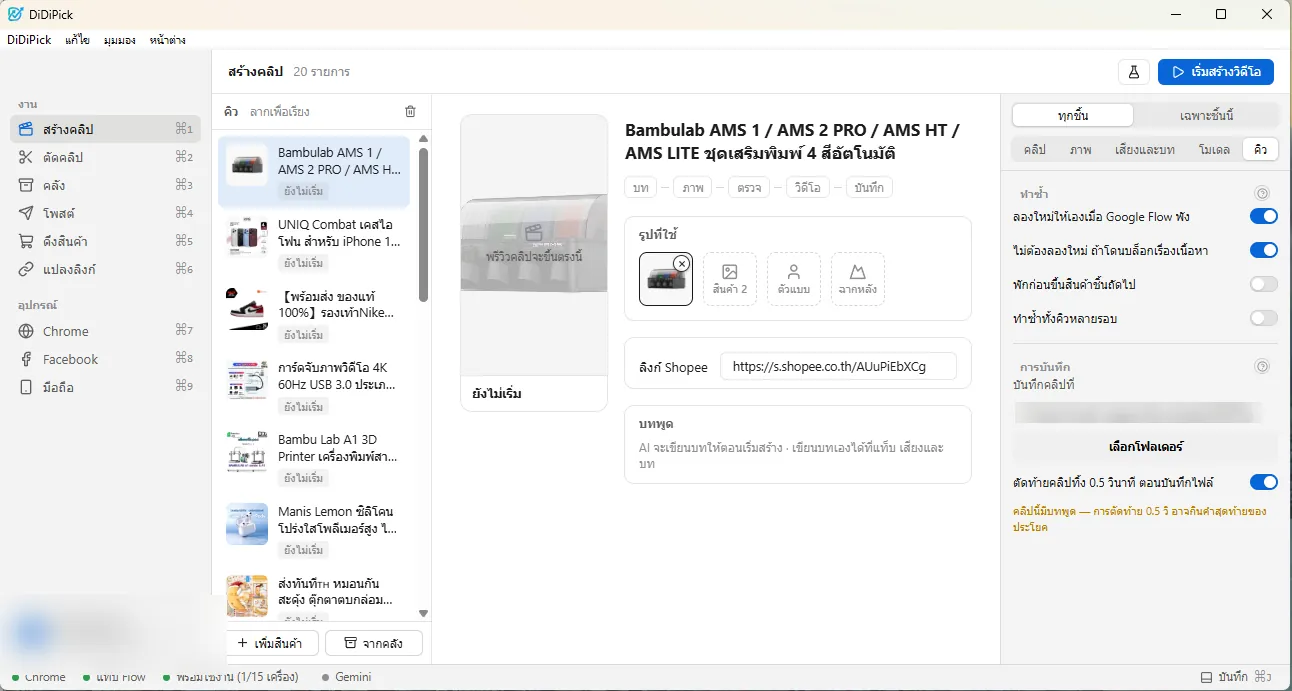
Queue tab Press “เริ่มสร้างวิดีโอ” (start) at the top right. The app writes the script, makes the image, then the video in Flow by itself. Do not close or use that Chrome meanwhile.

Working 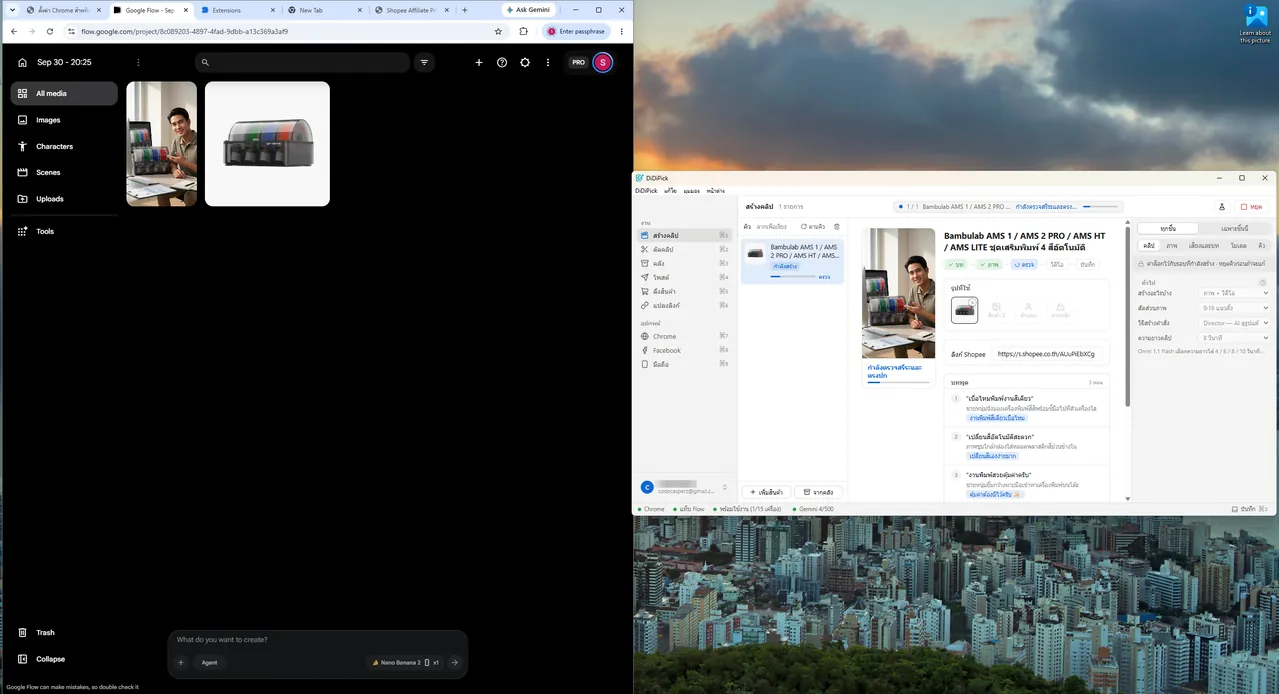
Flow working by itself in Chrome When done it says “เสร็จแล้ว”; press “เปิดไฟล์คลิป” to watch. The clip goes into the library by itself.

Done
12. Library
The คลัง (library) menu has two tabs. สินค้า: pulled products — select and press “ทำคลิปที่เลือก” (make clips). คลิปที่ทำแล้ว: finished clips ready to post.
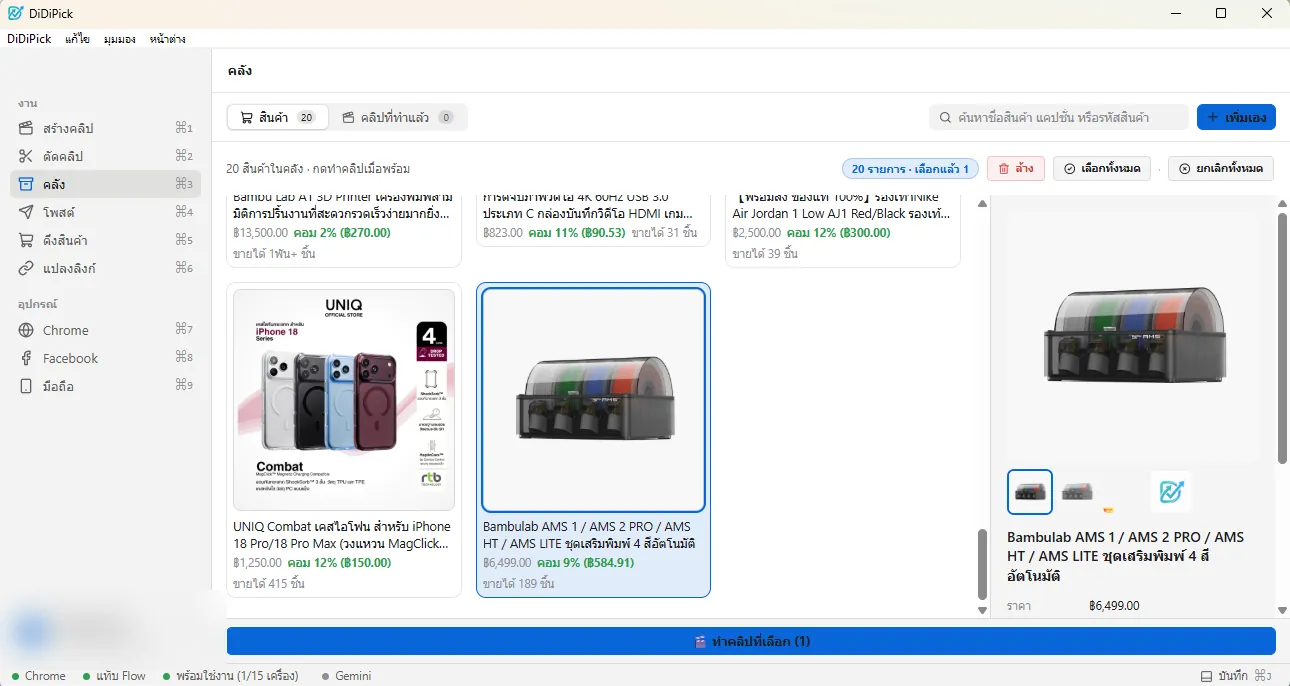
Products tab 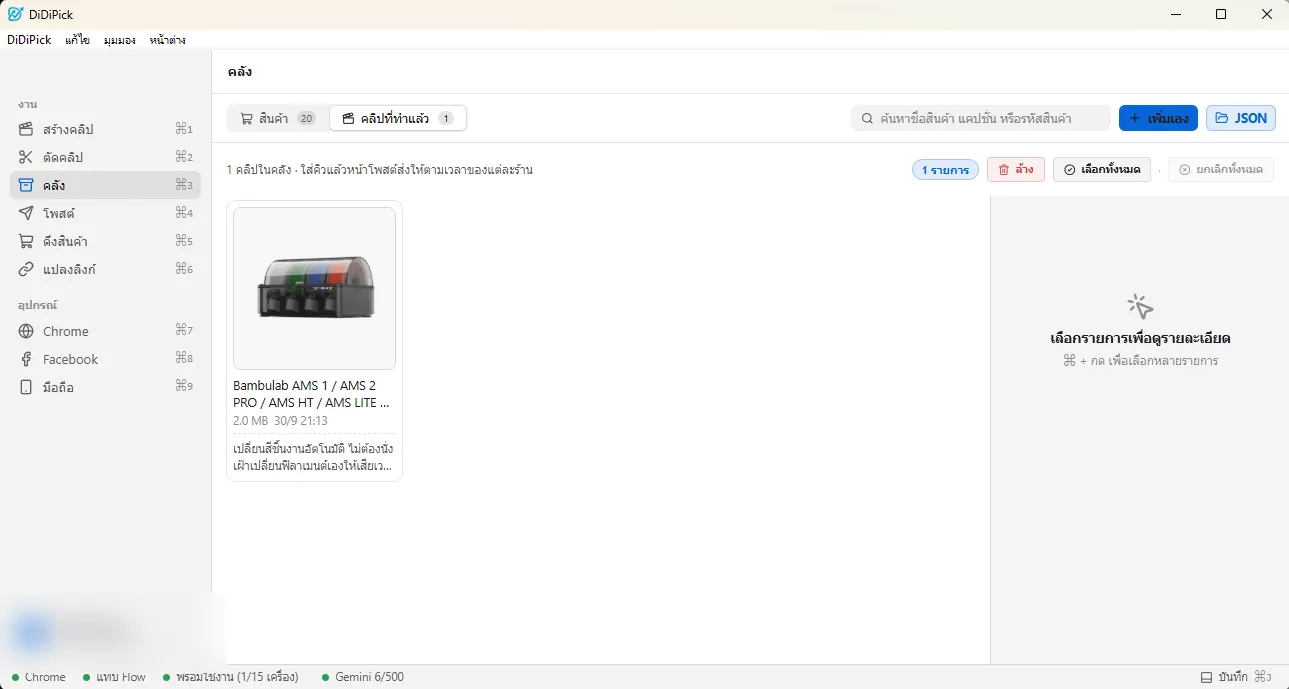
Finished clips tab Click a clip to see its caption. “ใส่คิวโพสต์” queues it for posting; you can also open it, copy the caption or remove it.
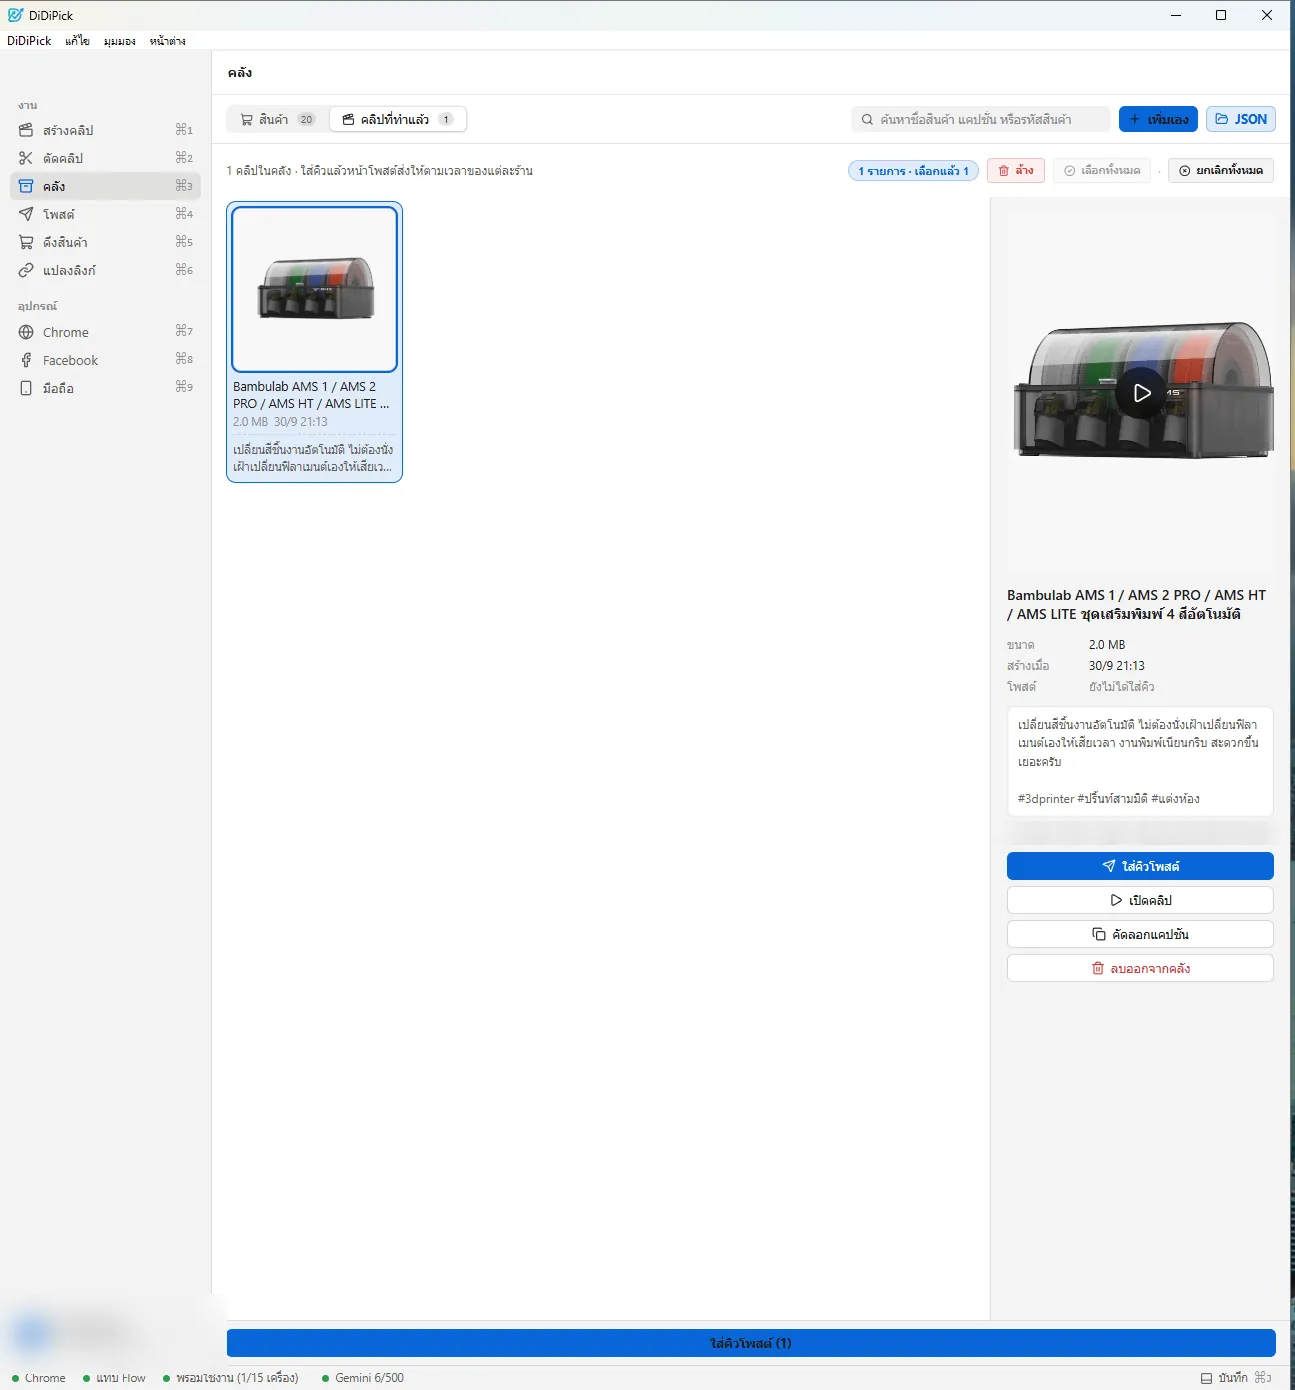
Clip details
13. Automatic posting
A shop = one Facebook Page + one phone. The app posts each clip to both on that shop’s schedule.
Open โพสต์ (post). In the ร้าน (shop) box pick the Page and the phone and switch the shop on. For more Pages press “+ เพิ่มร้าน”.
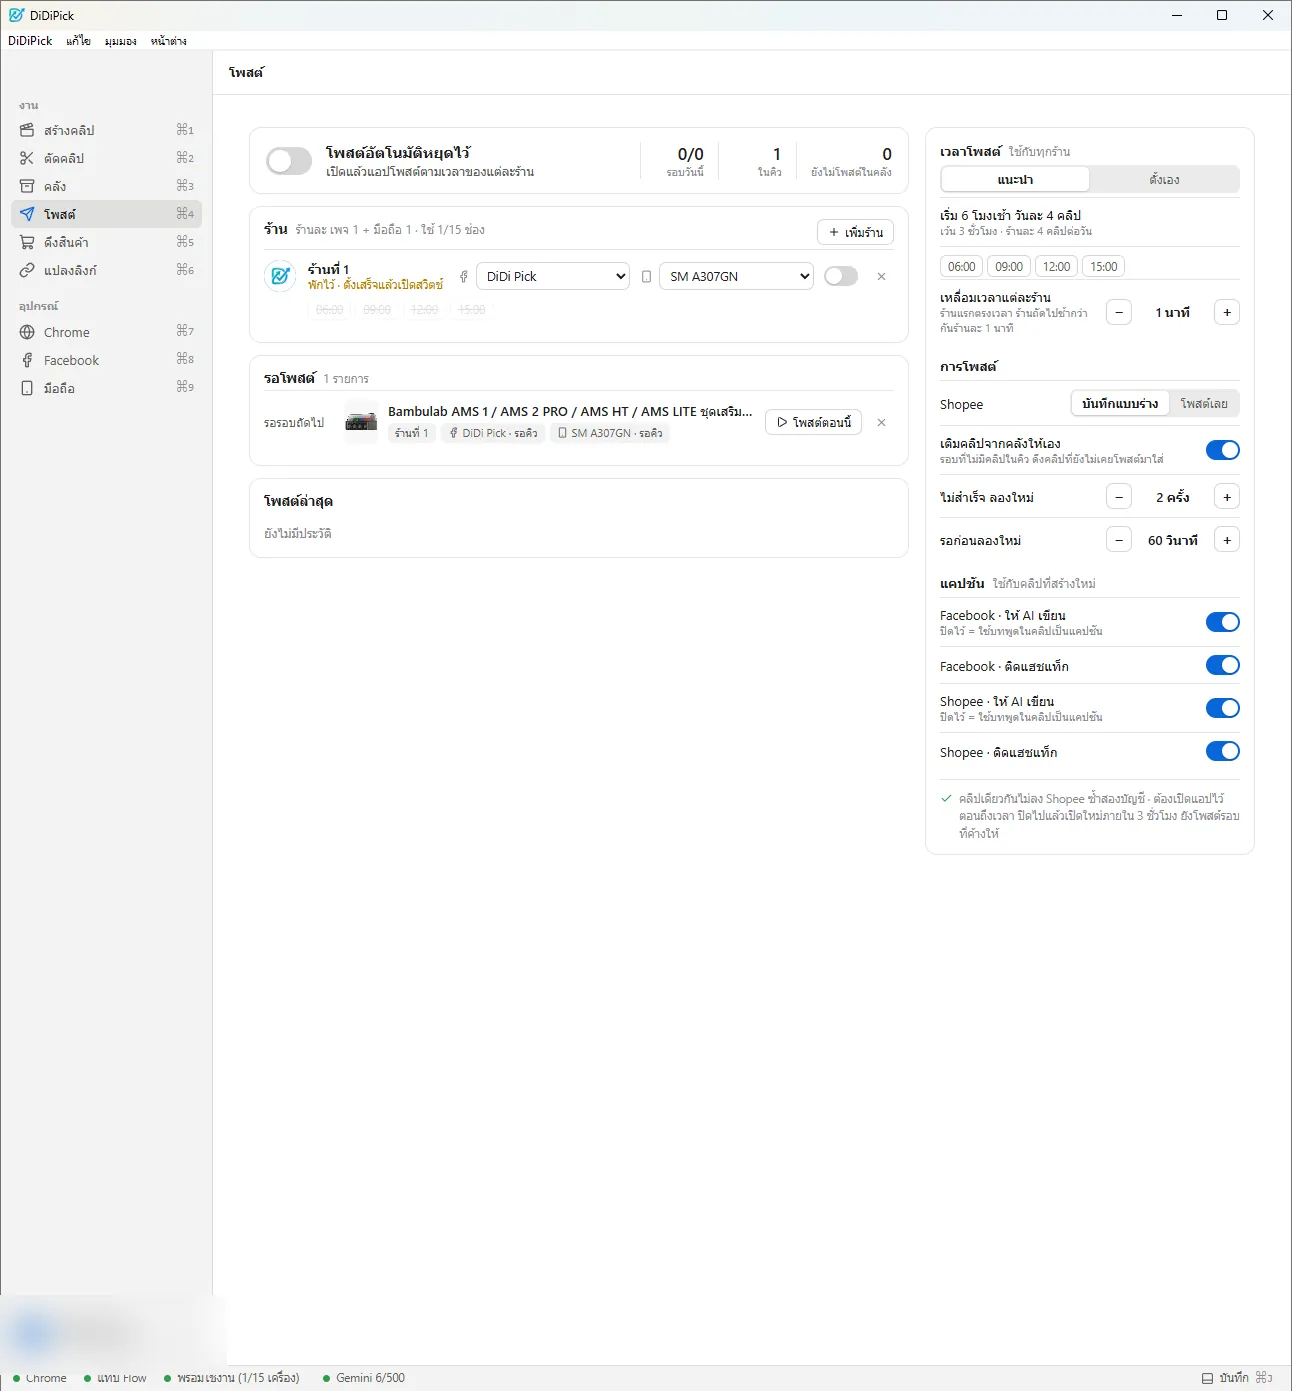
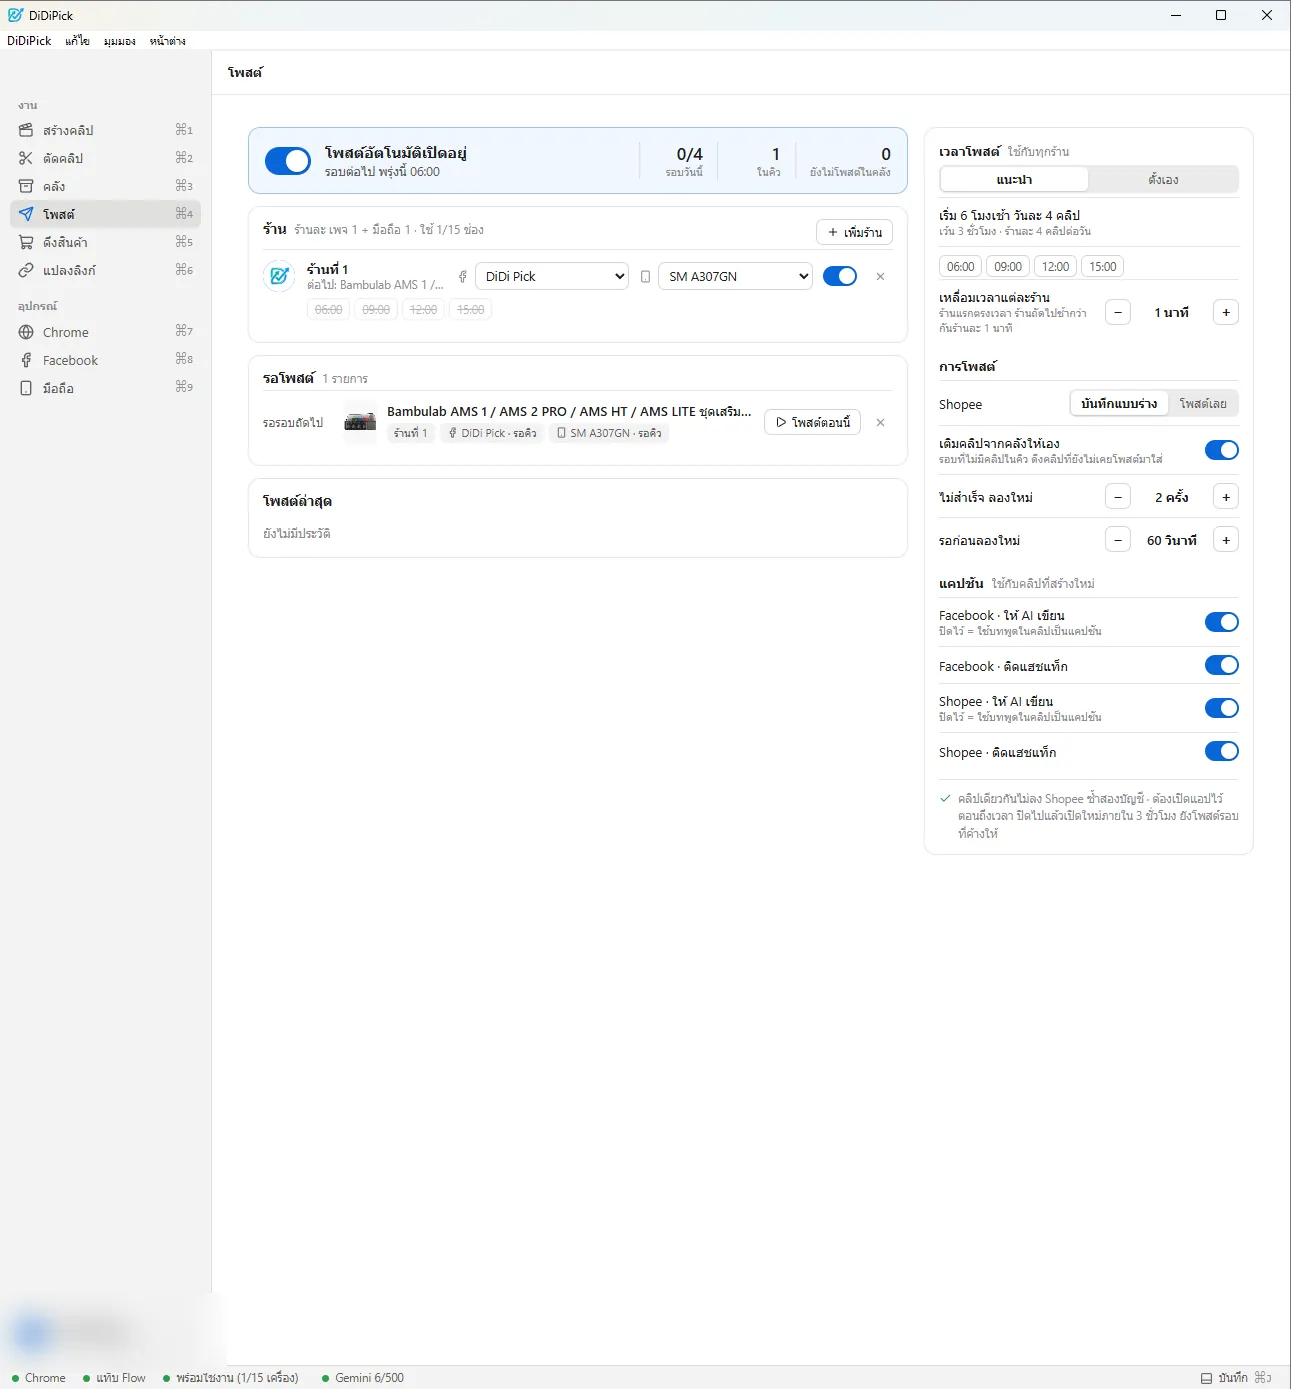
The post page Post times: “แนะนำ” (suggested) starts 6 am, every 3 hours, 4 clips a day — or “ตั้งเอง” (custom). For Shopee choose “บันทึกแบบร่าง” (save a draft and post it yourself in the app) or “โพสต์เลย” (post now).
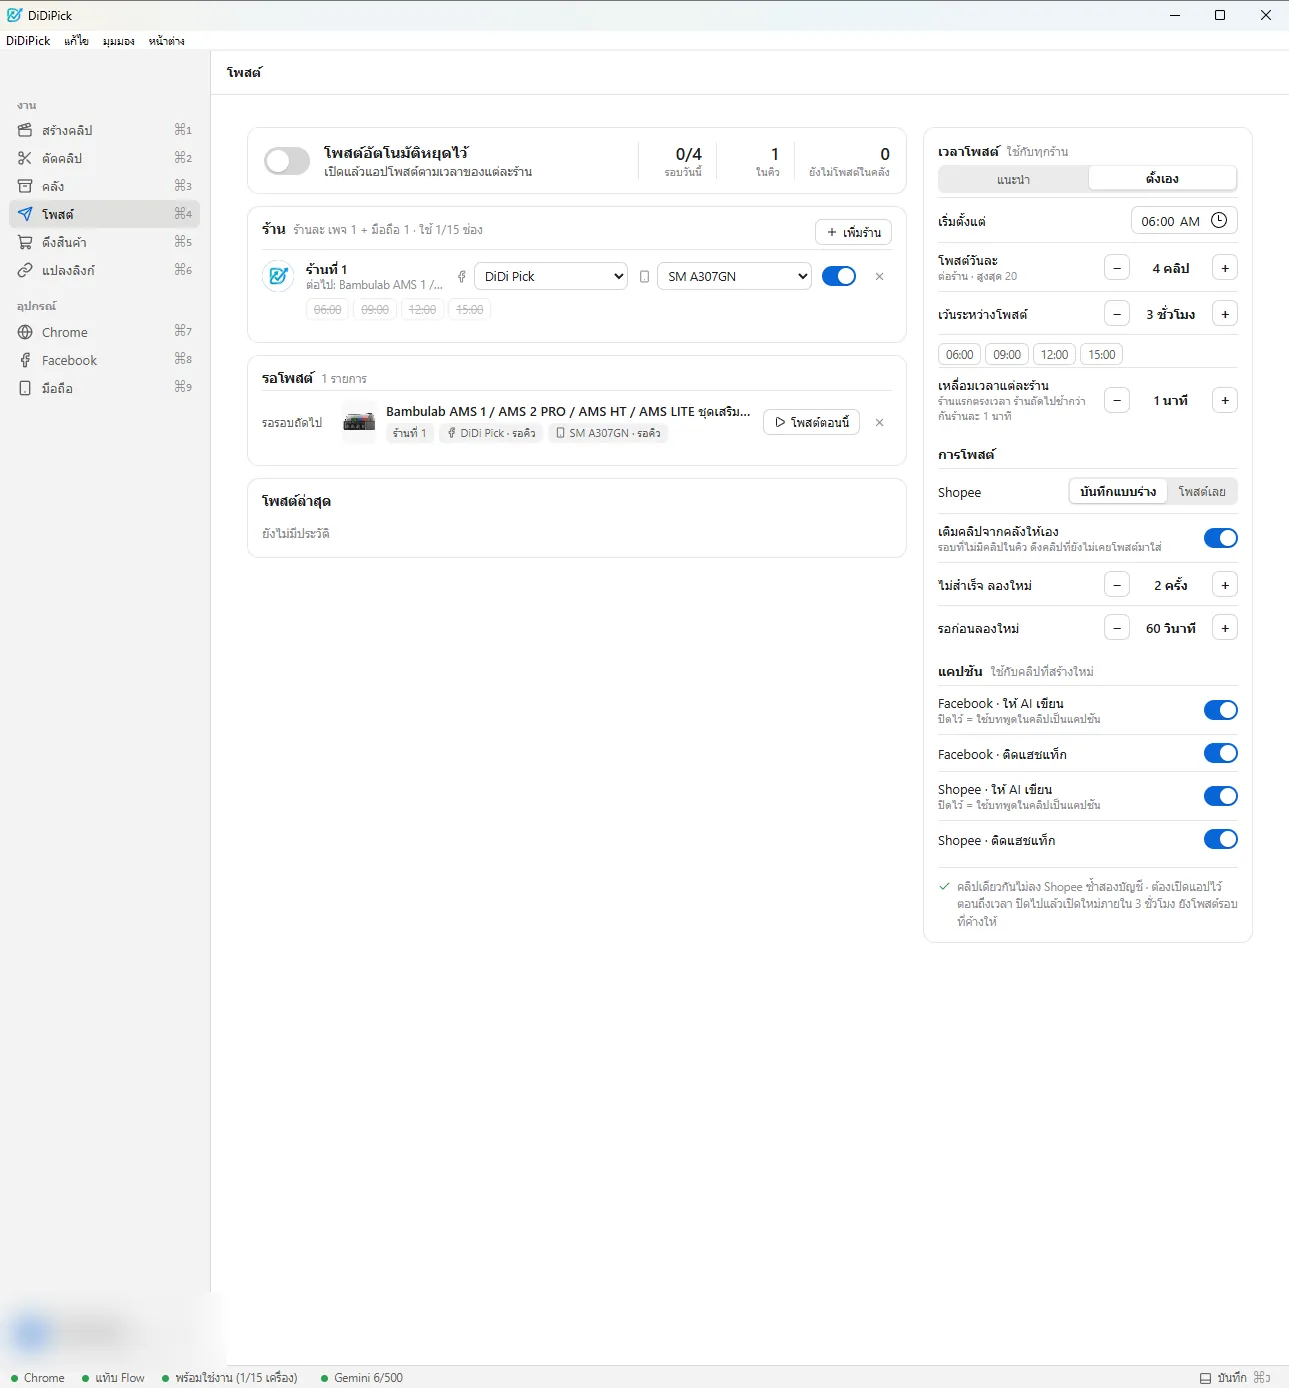
Custom times Turn on the “โพสต์อัตโนมัติ” (auto post) switch at the top. To post a waiting clip right away press “โพสต์ตอนนี้” (post now).
Auto post on Result: Facebook gets a Reel with the product link in the first comment. On Shopee, if you chose draft, the clip waits in the Shopee app’s drafts on the phone.
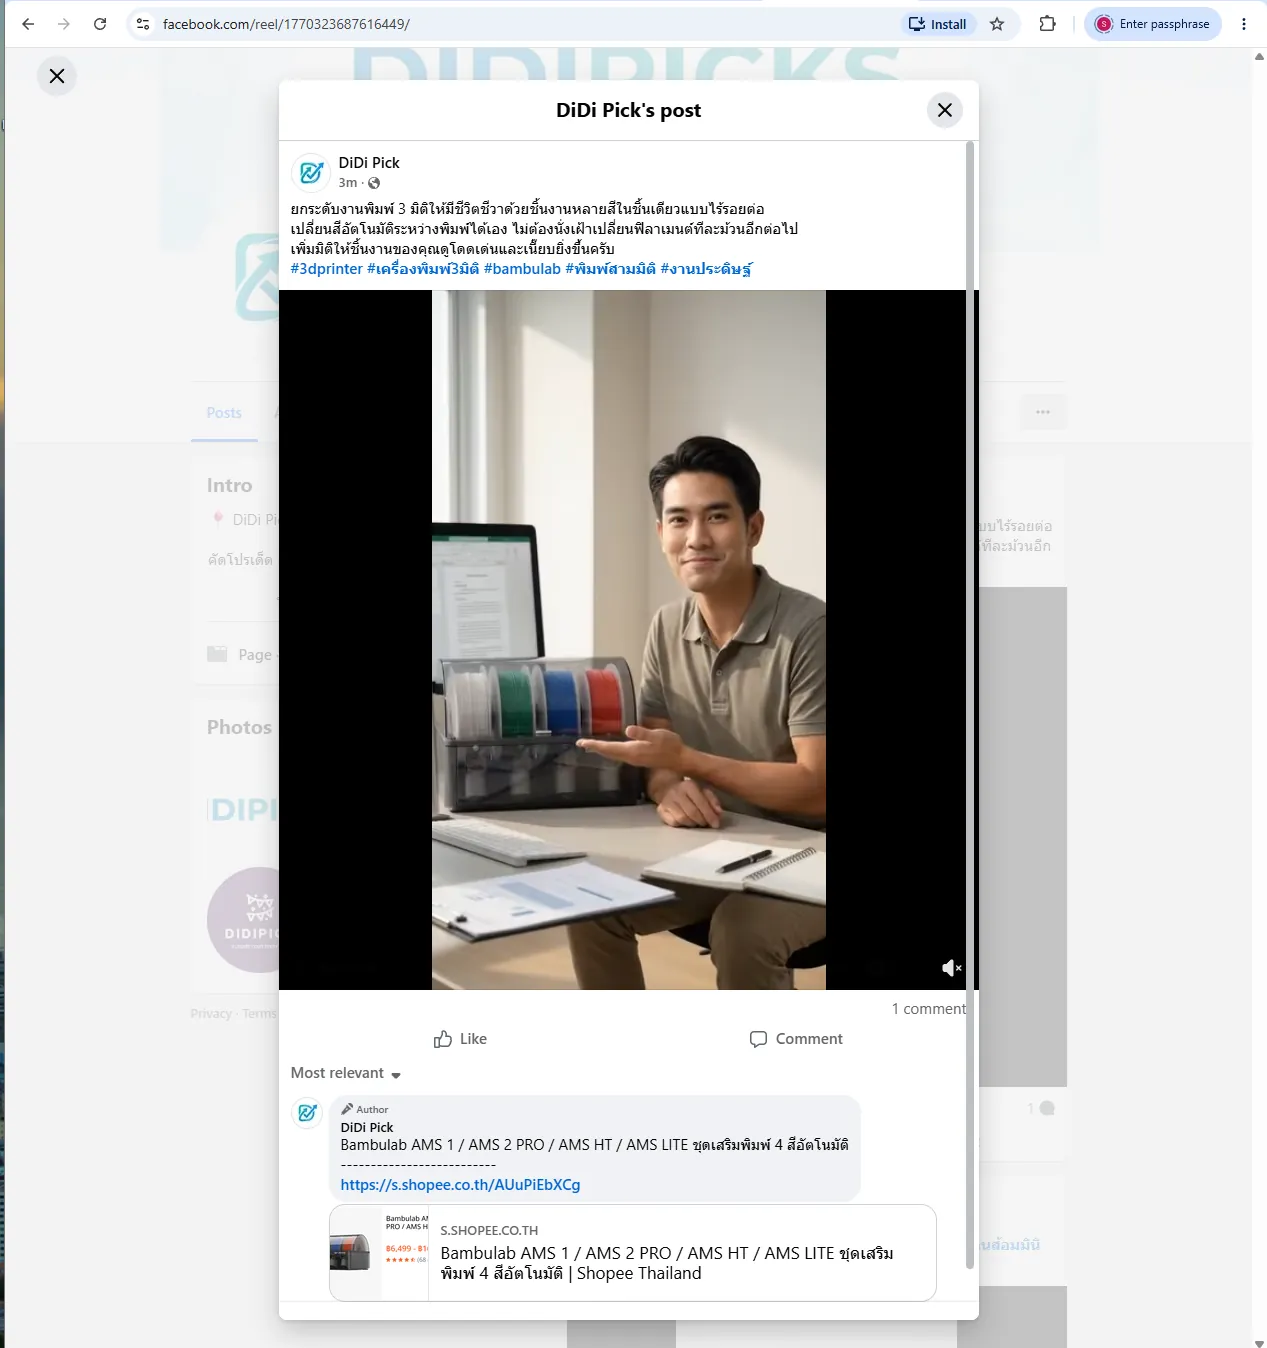
The Facebook post 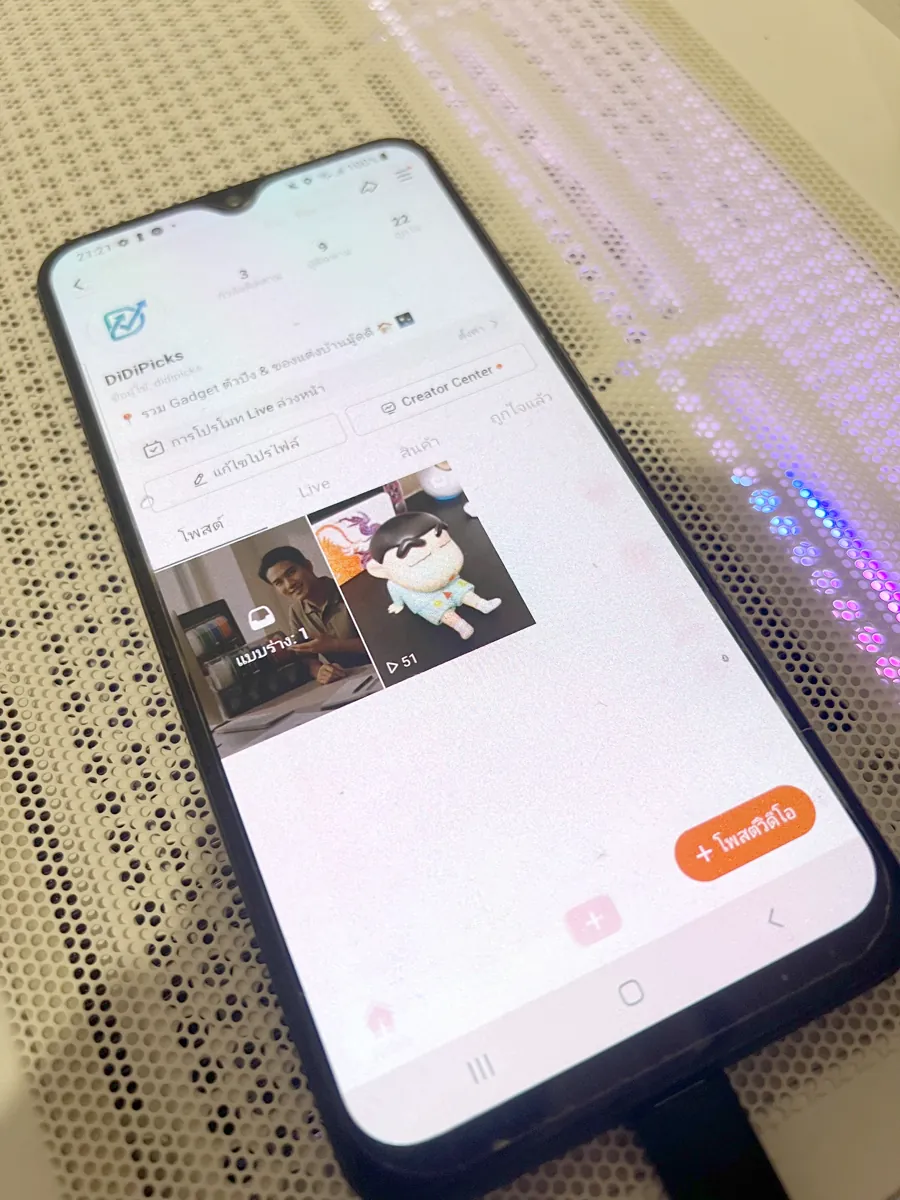
Draft in the Shopee app
The app posts only while it is open and the phone is plugged in. If you reopen it within 3 hours it catches up on missed rounds. The same clip is never posted to two Shopee accounts.
14. Other menus
Click your name at the bottom left for: settings, account and permissions, open the DiDiPick website, changelog, activity log, sign out.

Account menu Settings → ทั่วไป (general): theme, keep the computer awake while working, open DiDiPick at login (recommended with auto posting).

General settings Settings → ข้อมูลในเครื่อง (local data): clip folder, move the library, clear cache, reset.
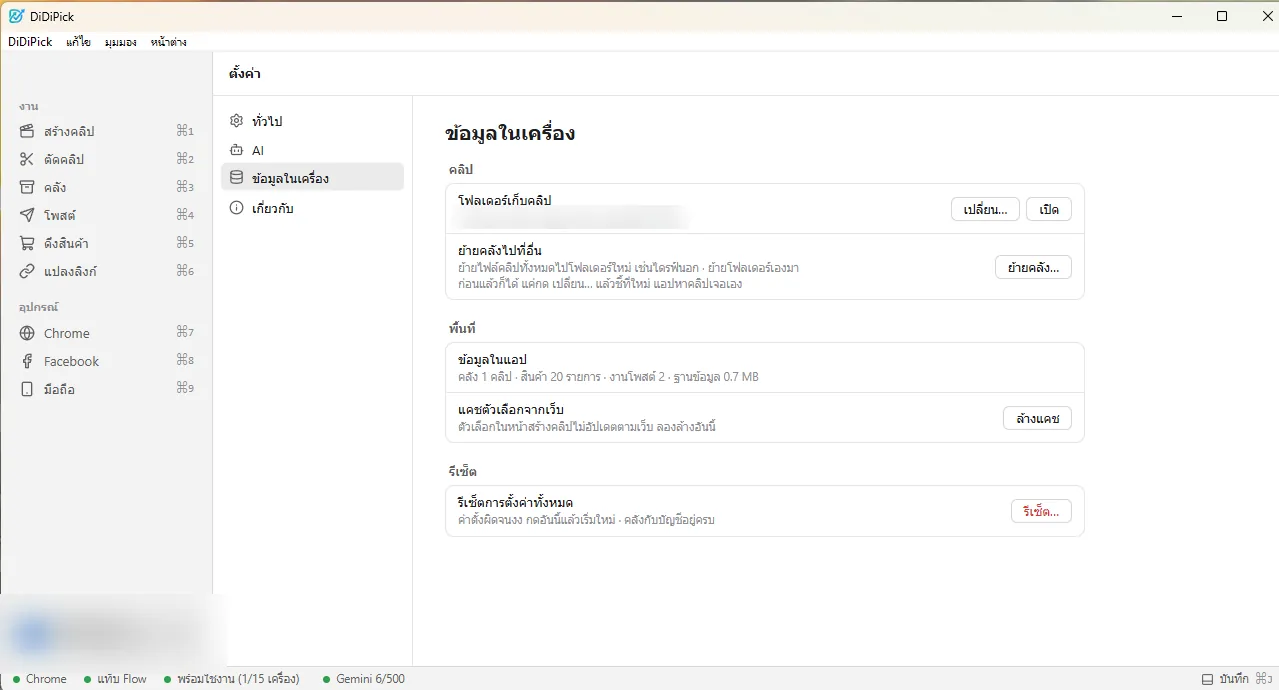
Local data Settings → เกี่ยวกับ (about): app version and “check for updates”, plus the activity log and app data folder to send us when something goes wrong.

About บัญชีและสิทธิ์ (account): your plan, slots in use (phone, Chrome, Page) and “ซื้อช่องเพิ่ม” (buy more slots).
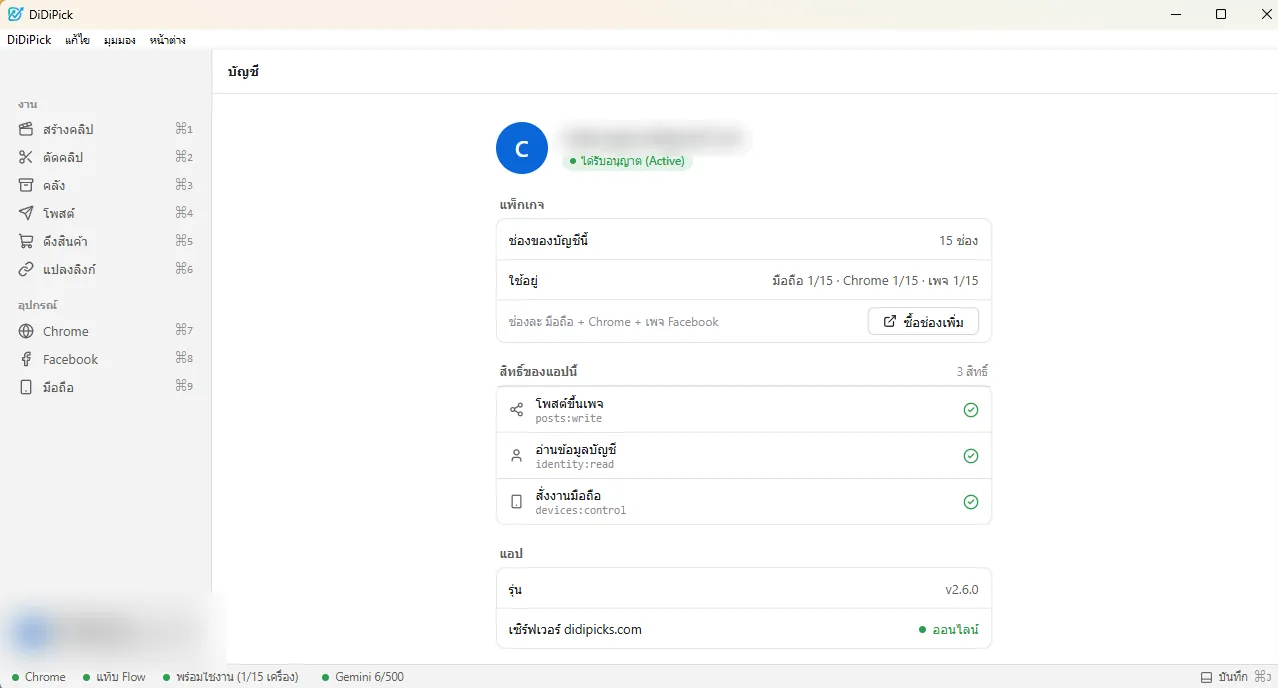
Account and permissions 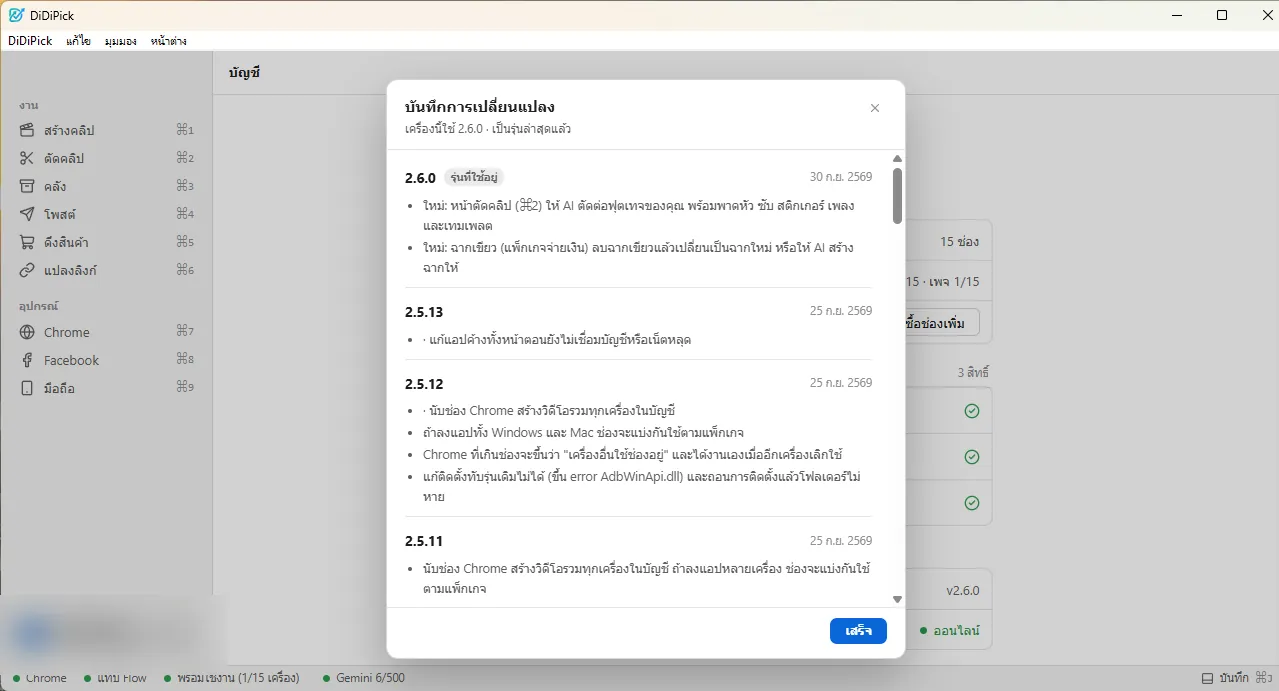
Changelog
15. Troubleshooting
- Phone offline or missing: unplug and replug, use a data cable, and make sure you allowed USB debugging on the phone.
- Chrome not showing connected: check DiDiPick Connector is on in chrome://extensions, then press “เปิด” (open) on that Chrome’s row in the app to pair again.
- “Manifest file is missing”: you picked the outer folder — pick the inner didipick-connector.
- Flow says unusual activity: a temporary Google limit. Wait a while and try again.
- Shopee posts fail after set-up: the Shopee app may have changed its layout — set the tap points again (sections 7–8).